The JFDI Guide to AWS IAC
Apr 5, 2019
7 mins read
Welcome to the first in the JFDI series!
There is a LOT of info out there about best practices, which tools are good, which tools are garbage and the absolute best way to do everything.
This blog series is about something different. It’s about just getting on with it and starting to try things.
It’s about trying something with the minimum of fuss without painting yourself into a corner.
It won’t be “how to be the best”, it’s “how to get past decision paralysis and just start learning”
At the end of the post will be the “DO MORE!” section that will have ways you can build on the skeleton framework we go over in this post.
JFDI means Just Do It without Fuss. What’s that ? Those letters don’t line up? My bad..
Agenda
We’re going to get you the means to get started using Cloudformation to deploy Infrastructure as Code and build up a VM (ec2) with an attached Firewall (security group). In the real world you’d grow this to add it into a VPC , Subnet and so on but this is a JFDI post. It’s not what it’s about. It’s about wetting your whistle.
Minimum of fuss.
We’re going to get your code writing local environment set up decently though, so that it’s easy to continue to go further. Little bit beyond minimum, but worth it.
Requirements (I’ll explain some of these more later)
- AWS account - free tier is all fine
- Visual Studio Code
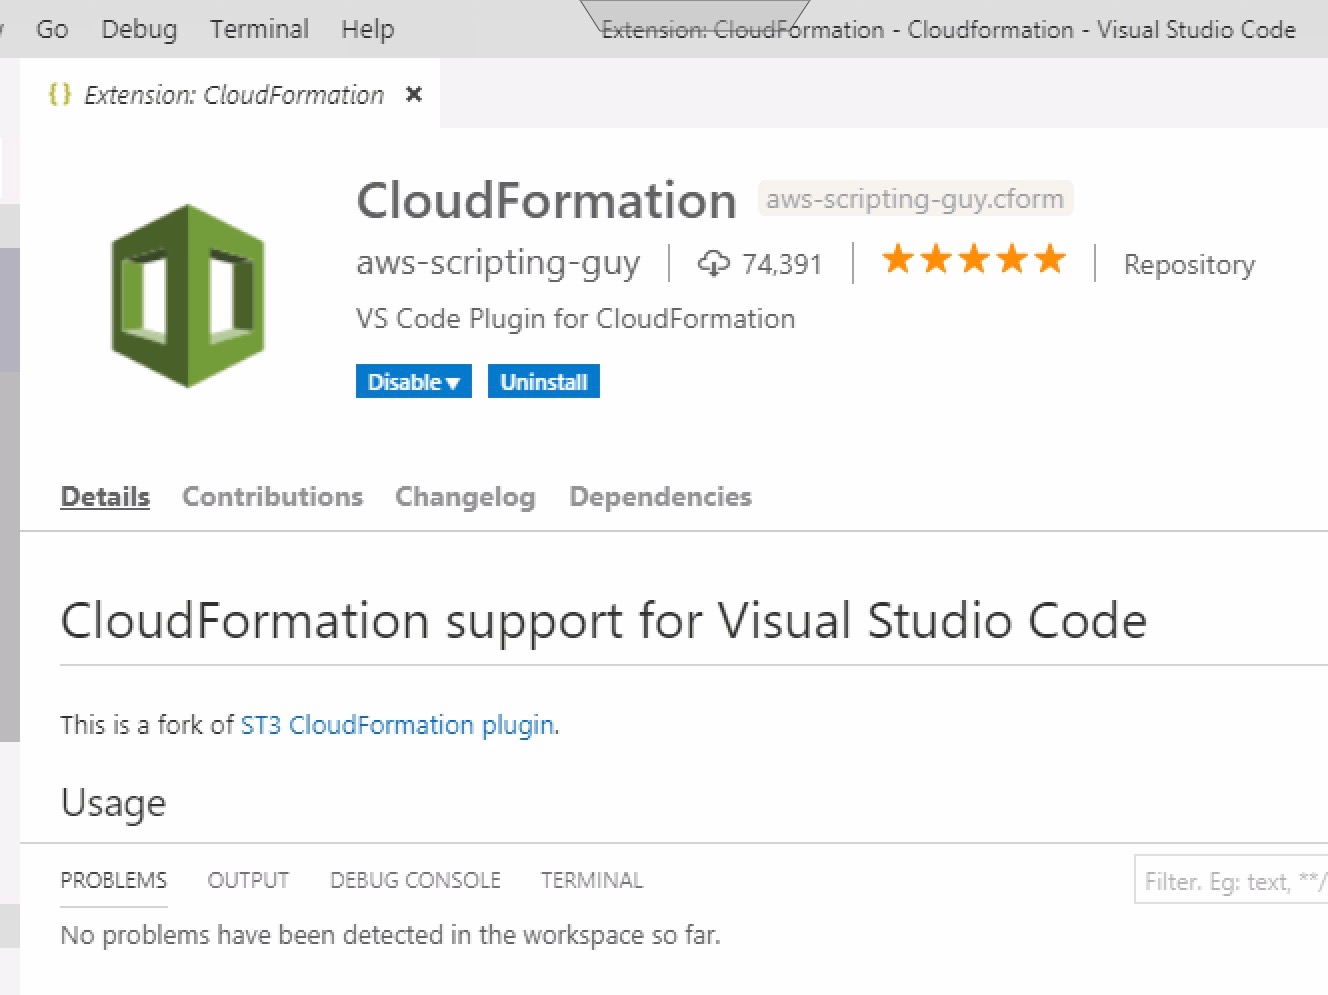
- Cloudformation plugin by aws-scripting-guy
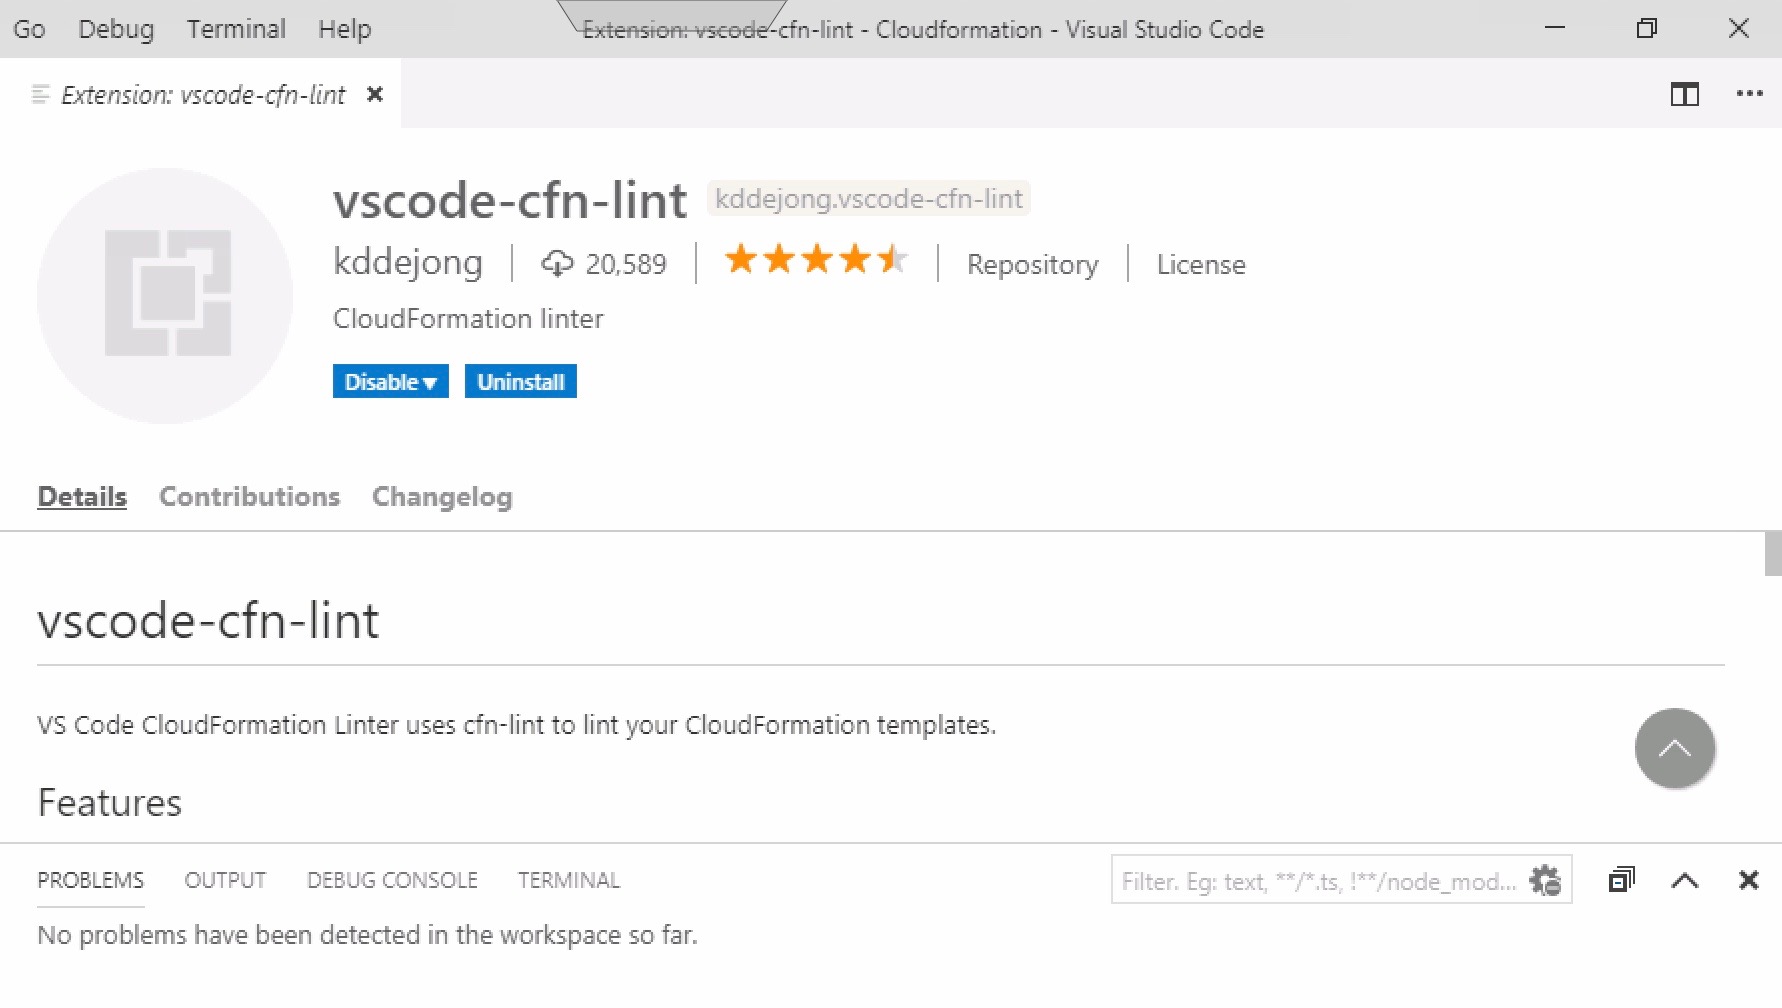
- vscode-cfn-lint plugin by kddejong
- Python 3.x
- cfn-lint (from PiP)
- About half an hour or less
Out of Scope explanations:
-
IAC - Infrastructure as Code I’m not going to go over the benefits of this. JFDI!
-
Source Control / Git I’m not going to go over the benefits of this or even mention it much in this post. That being said, JFDI. It’s not that hard to get a one person flow going.
-
JSON templates instead of YAML.
Let’s FDI !
At a high level here’s what we’re going to do
-
Install a plugin that both helps format YAML and offers snippers for Cloudformation Resources (READ THE INSTRUCTIONS ON THE PLUGIN, You have to edit the settings to stop incorrect red lines.)
-
Install a plugin that “lints” your Cloudformation template and tells you whether your template is hot garbage or whizzbang good. The only two standards worth using. ISO has nothing on them. This one’s got a few more steps.
-
We’re going to write a template. Save it.
-
Open the AWS console and tell it to use it to build some dope infrastructure. Dope is a word the kids use to mean good, not silly as you might expect.
Round 1 - FIGHT!
Get an AWS account signed into, Download Visual Studio Code, Install Python.
There’s links from the requirements section. Why you even here if you’ve not done the requirements?
Make sure Python is on your PATH too ideally. So if you type “python”" in bash, or powershell it knows what it is.
If you’re using a different shell you probably know enough to fix errors like it not being on the path. If stuck, type words into google.
Round 2 - FIGHT!
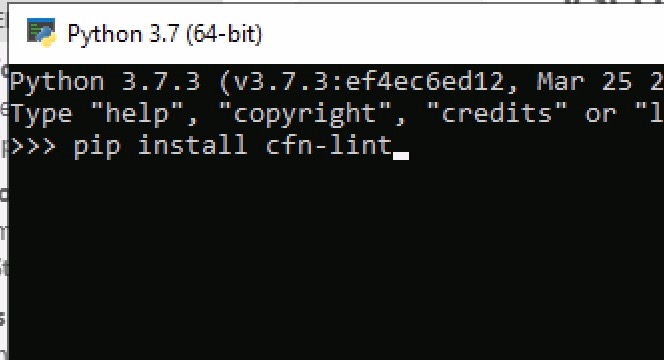
Open Admin Powershell / Bash whatever. You can even go to the python REPL I believe and do it there if you failed to get it on the path.
type “pip install cfn-lint”
This is a Cloudformation python based linter provided by AWS. It can be run against templates from the cmdline. Luckily, someone made a VScode plugin that runs it against your template in VScode and that makes it a lot easier.
Once that’s in and successful. Open up VScode and install the following two extensions. Take note, the linter extension is just using that python program you installed in the background. So if you didn’t do that, it won’t work.
Okay, we are ready to go !
Round 3 - FIGHT!
Hope you’re ready for a lot of pictures. Maybe a Gif. Who knows. Am feelin’ saucy.
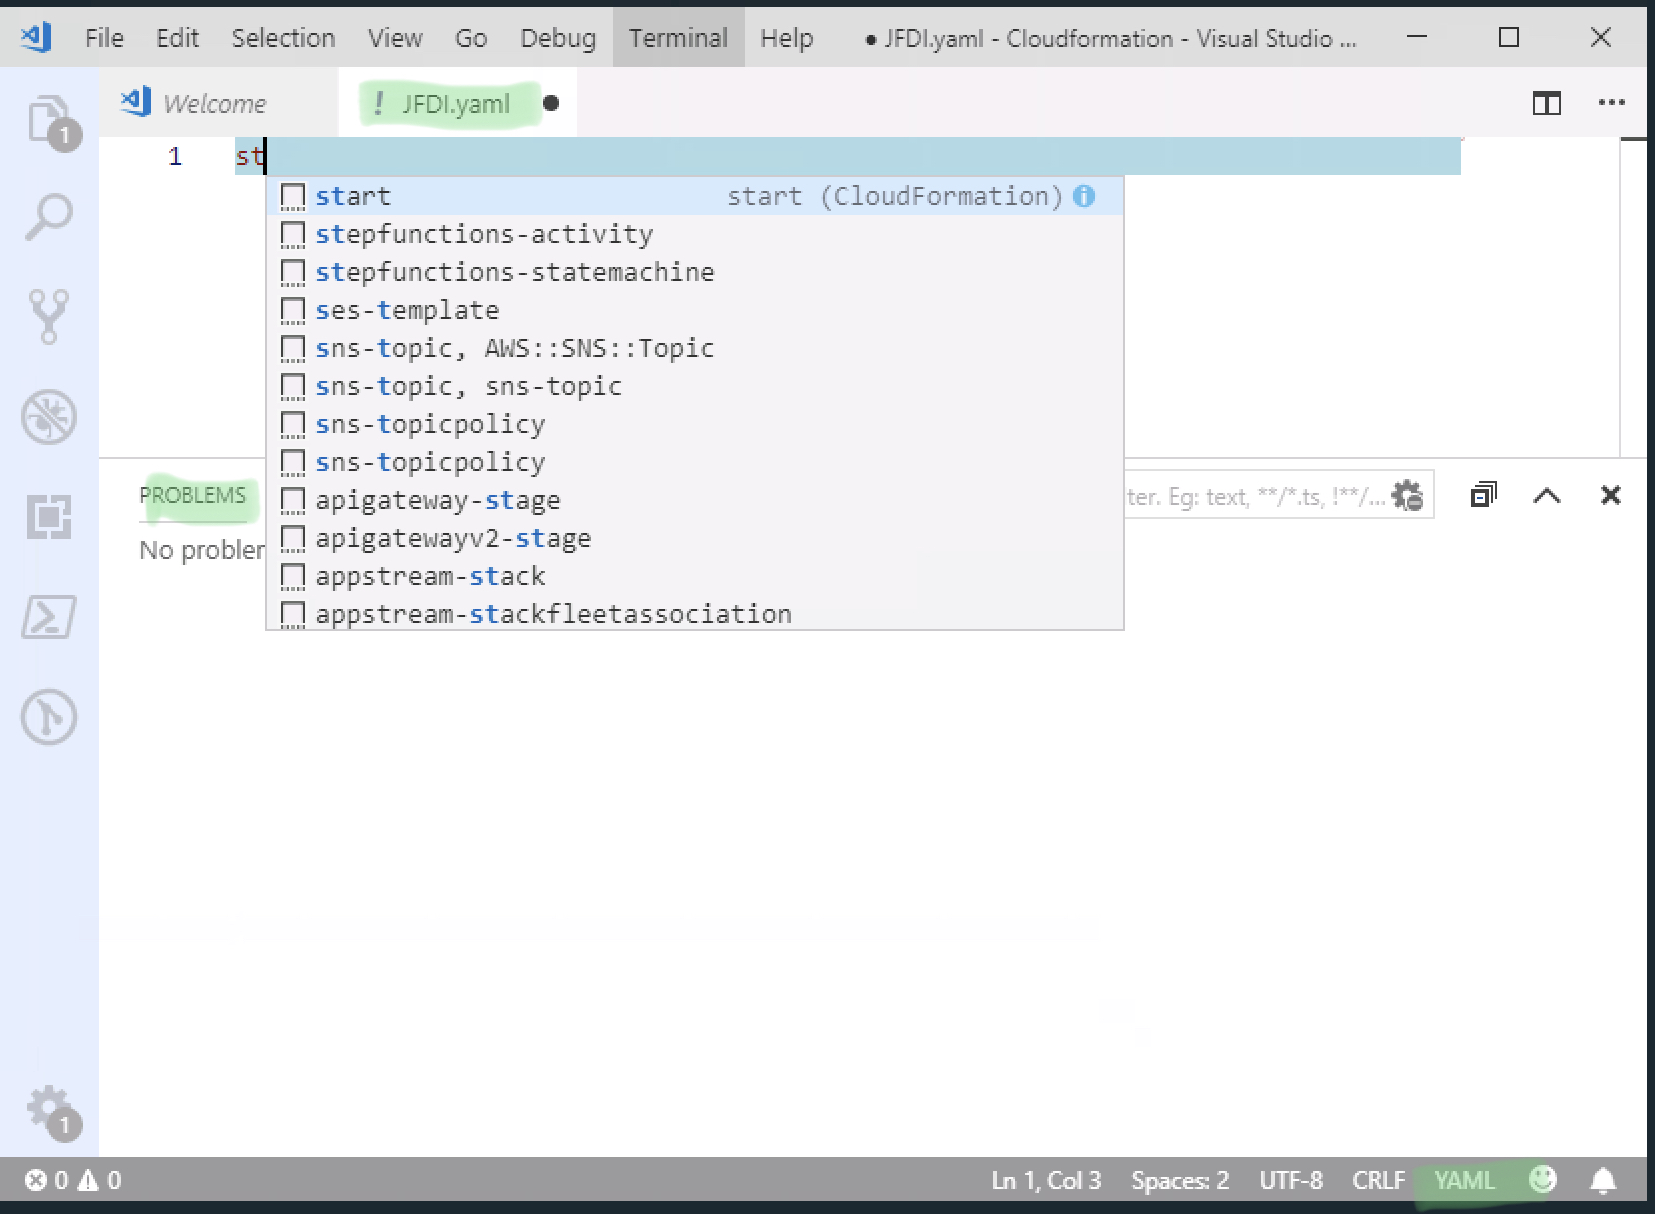
First thing to do is create a new yaml document.
Once you’ve got that, make sure terminal is open at the bottom from the View menu so you can see any Problems on the problem tab.
Now being typing “start”.
At which point you should see an autocomplete menu come up. (see pic) If it doesn’t, then something is wrong with the extensions. Restart VScode and try again.
Hit TAB to autocomplete and it will show you the following. You don’t NEED all those fields and this is JFDI so let’s delete it to the bare minimum.
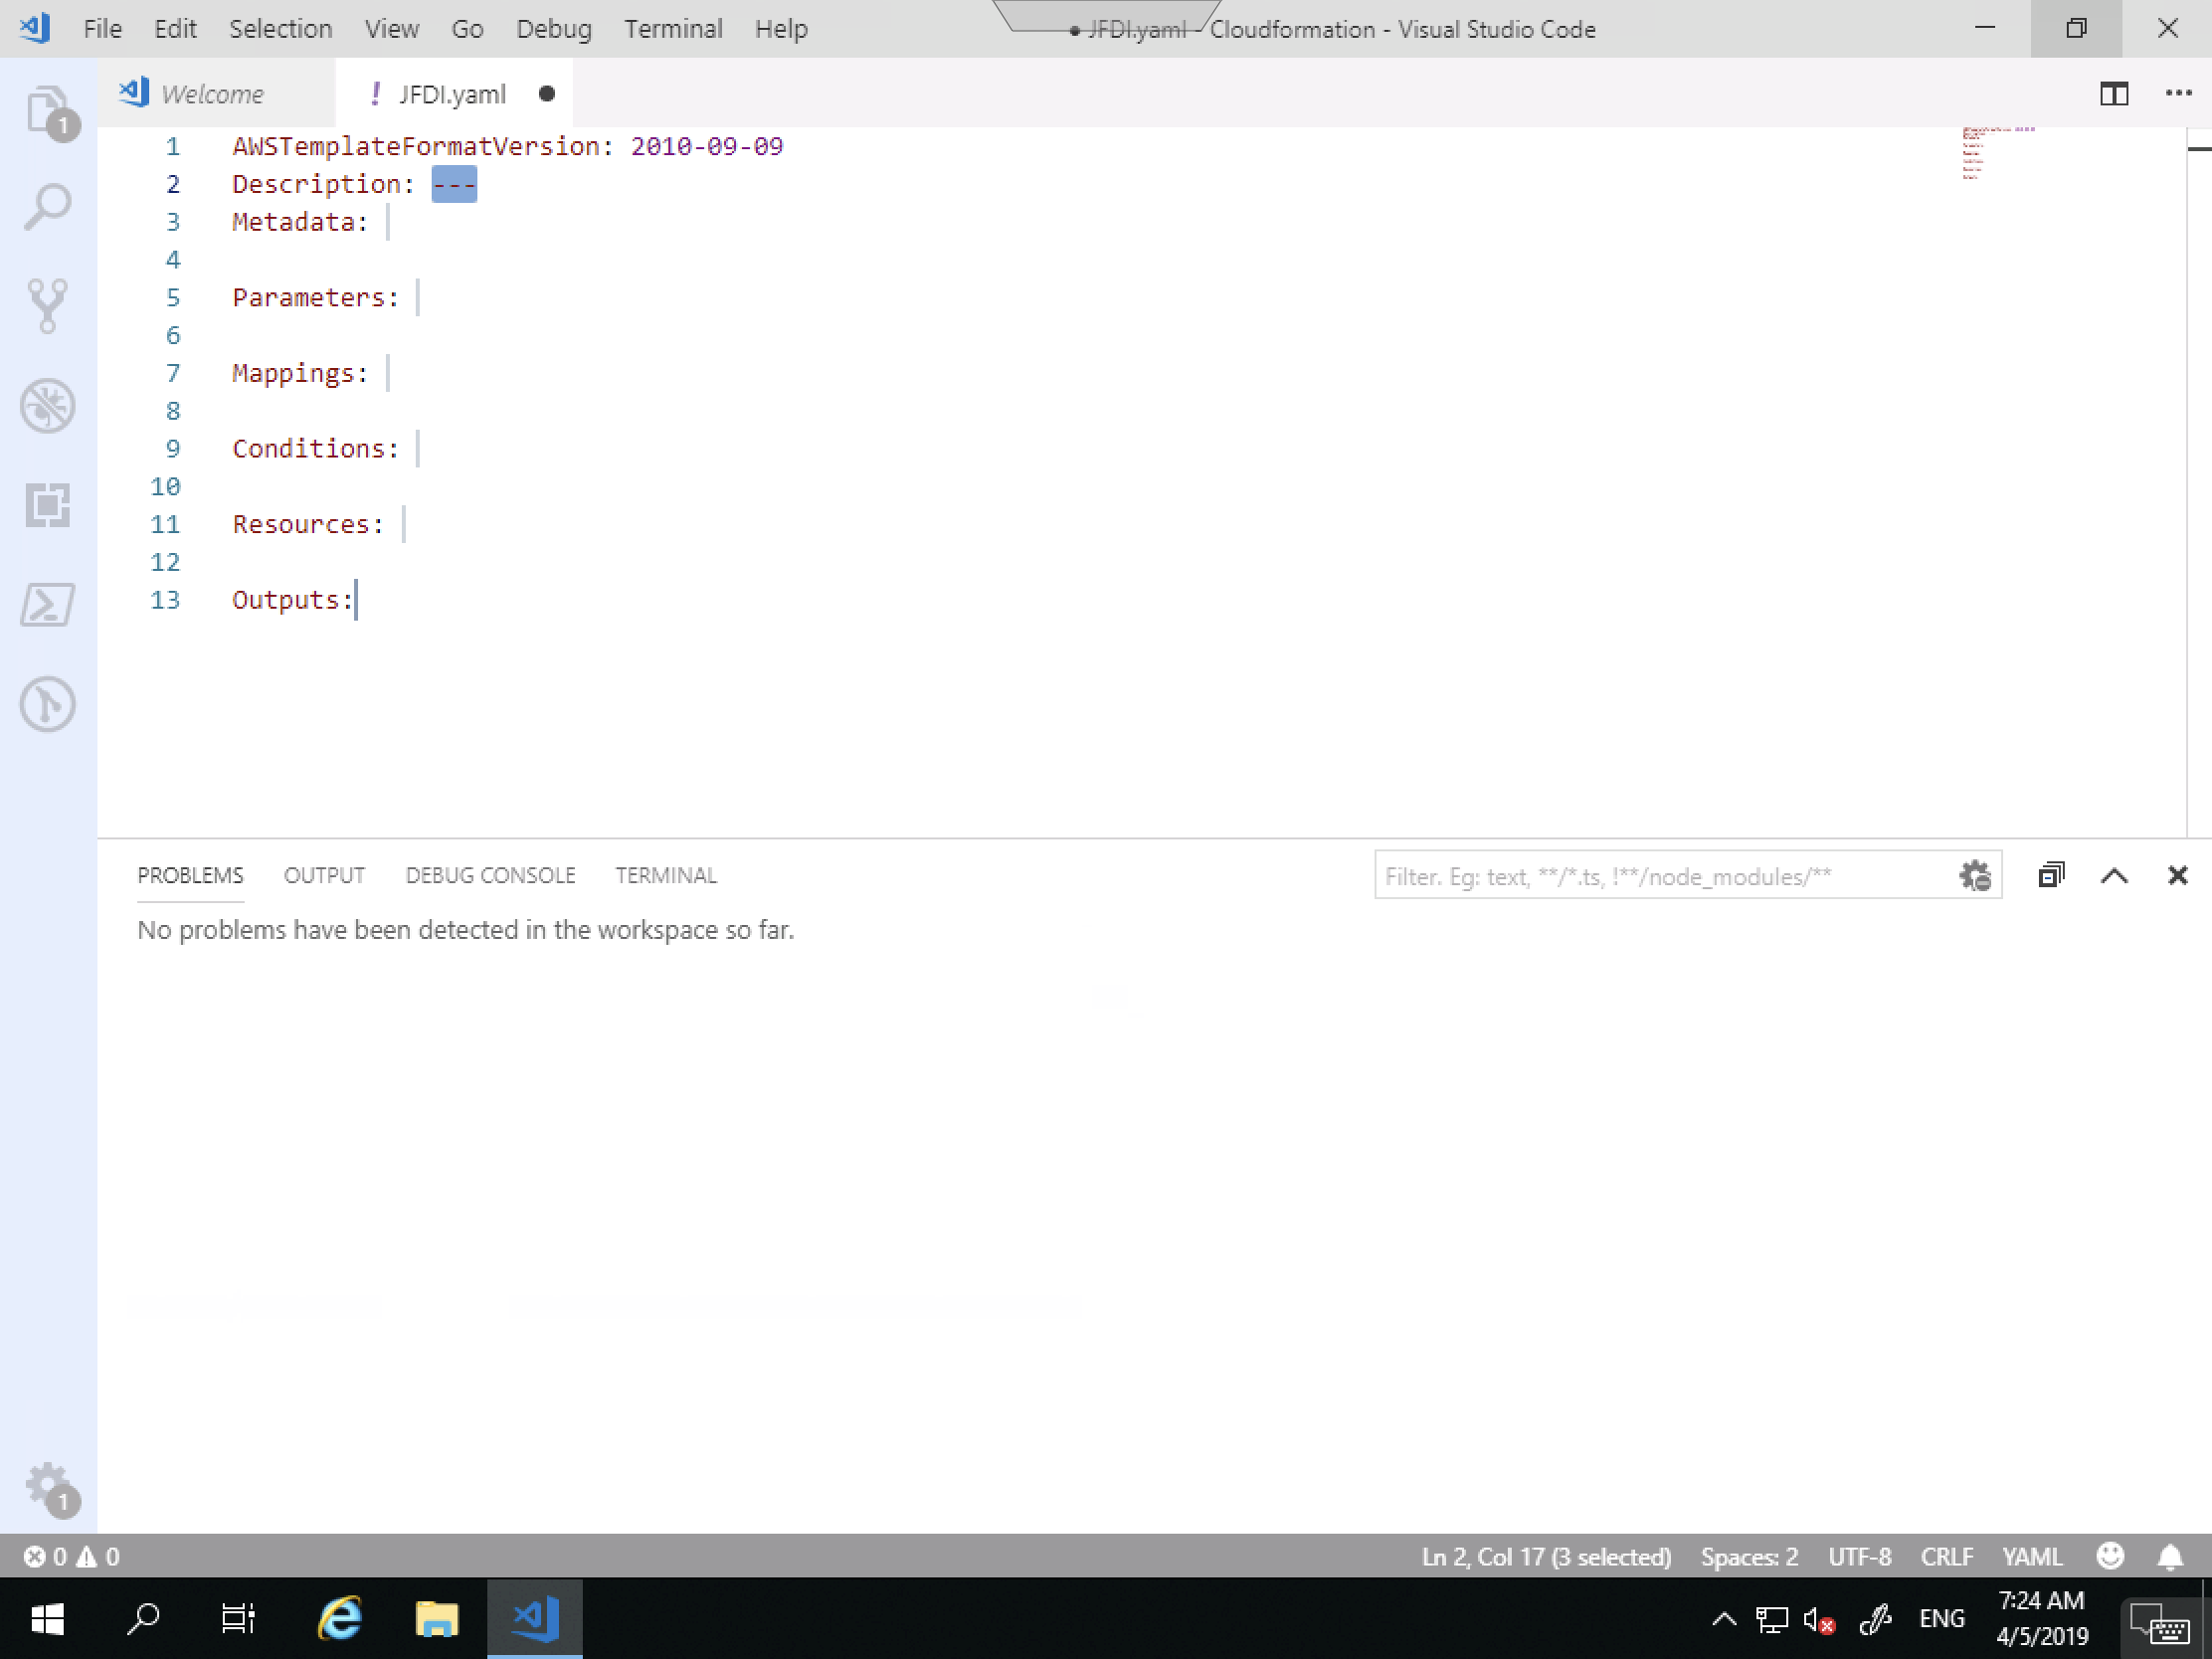
This is a lot less intimidating.
Notice for the Description I don’t have to use quotes.

with YAML, it’s all about indentation.
So come down a line and in one tab and begin typing ec2-instance , highlight the correct one and tab again.
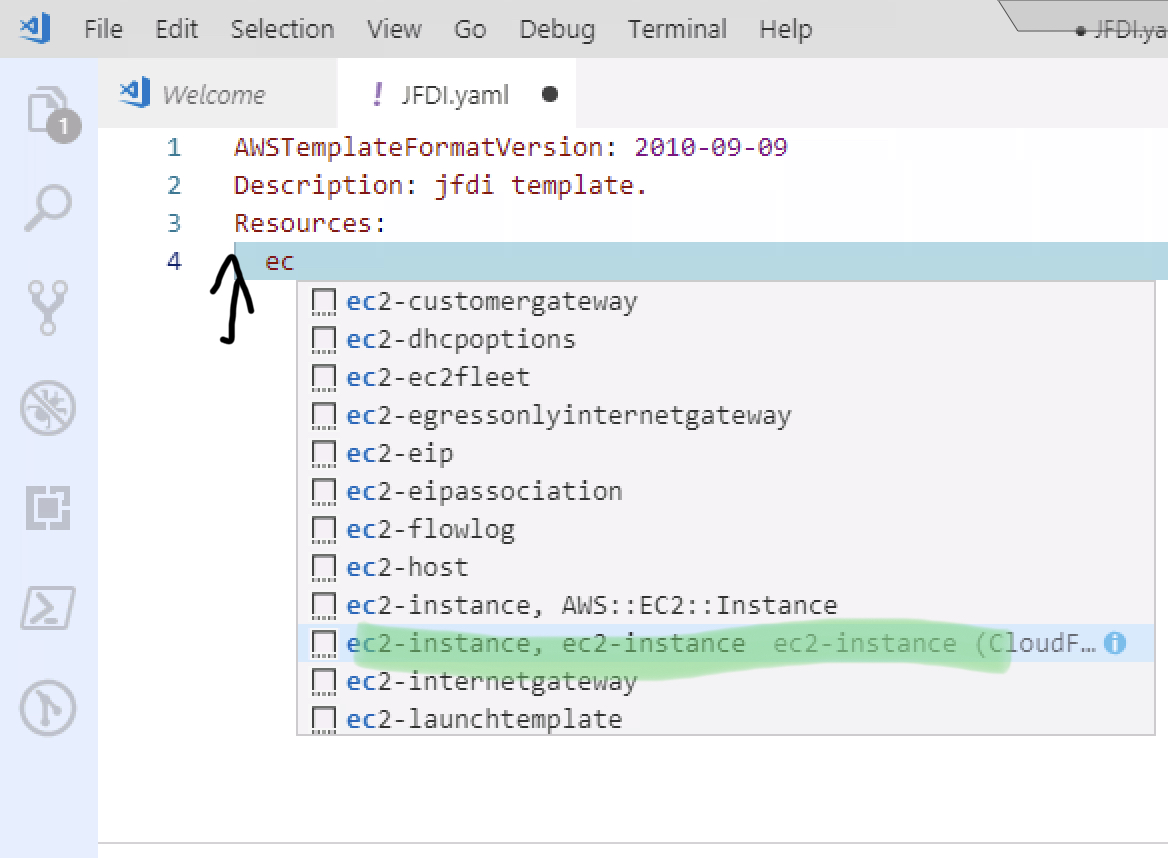
Once again, you end up with way more stuff than you need to JFDI so let’s trim it up.
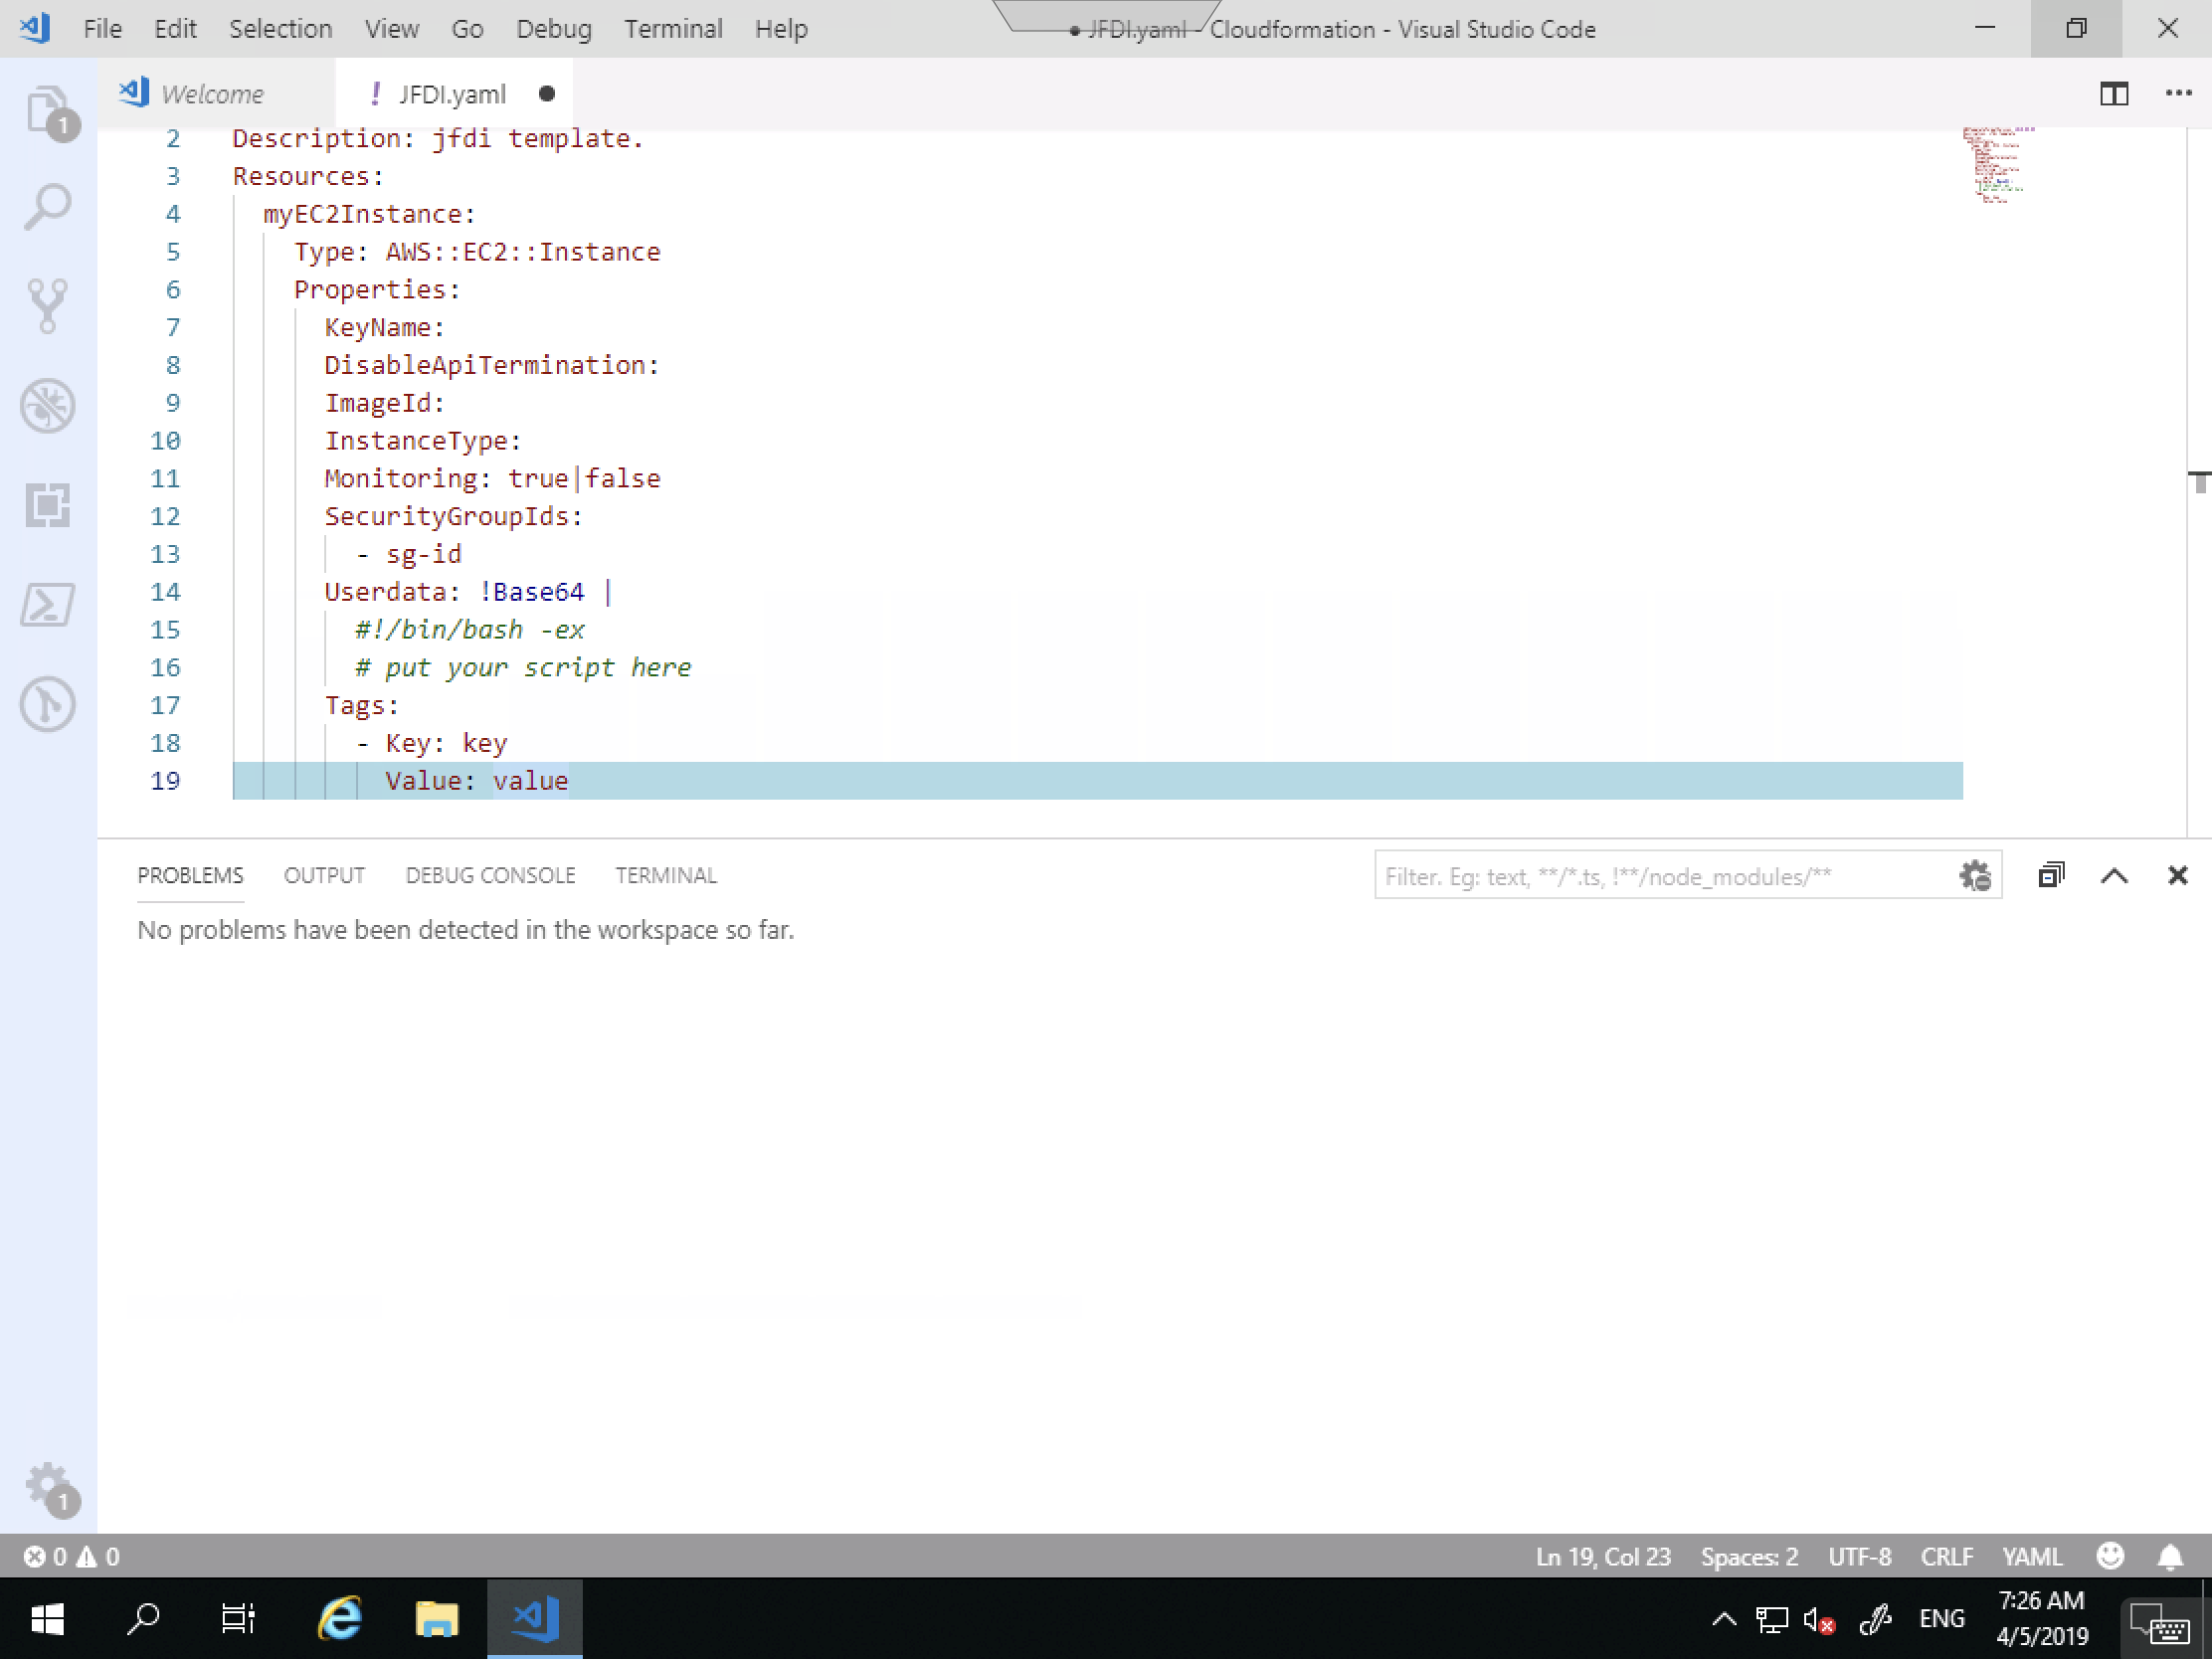
Just an example
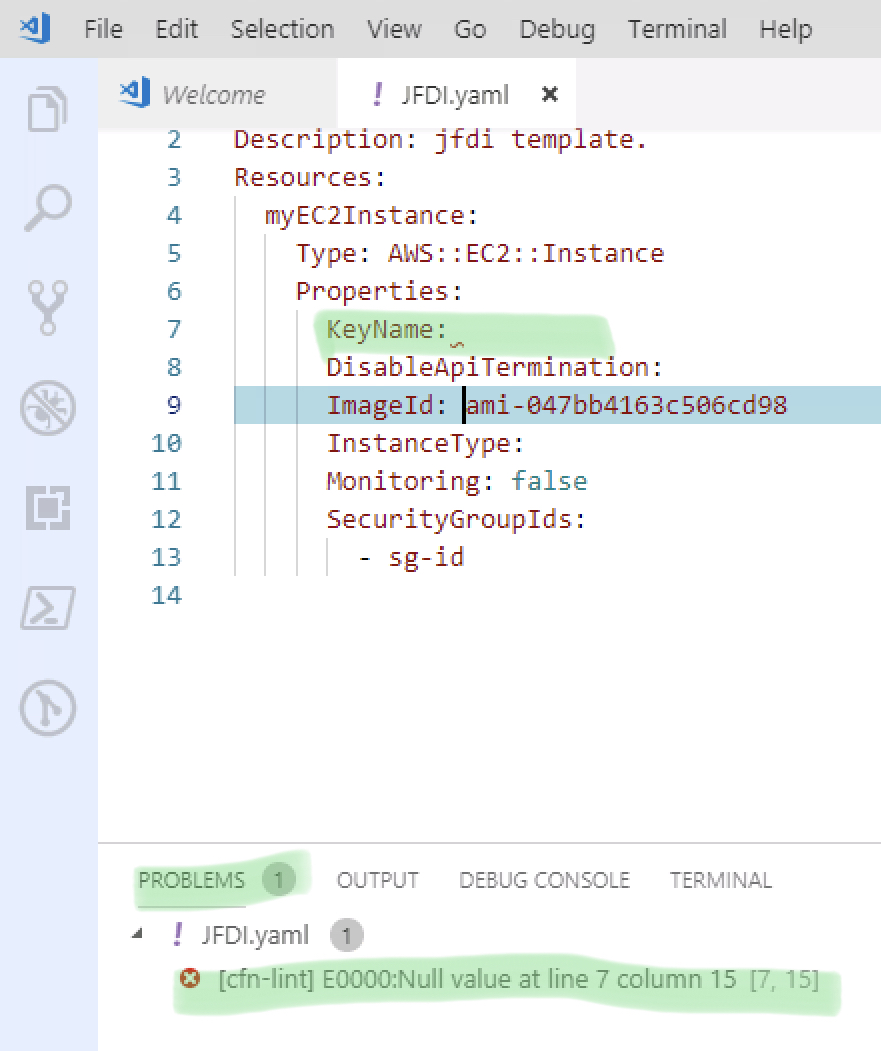
Here is what it looks like when the linter thinks you’re doing it wrong.
Null Value at line etc.
This means, it’s not filled in and needs it to be since you’ve specified the Key with no Value;
But we’re going to just delete it, along with the other unneeded ones.
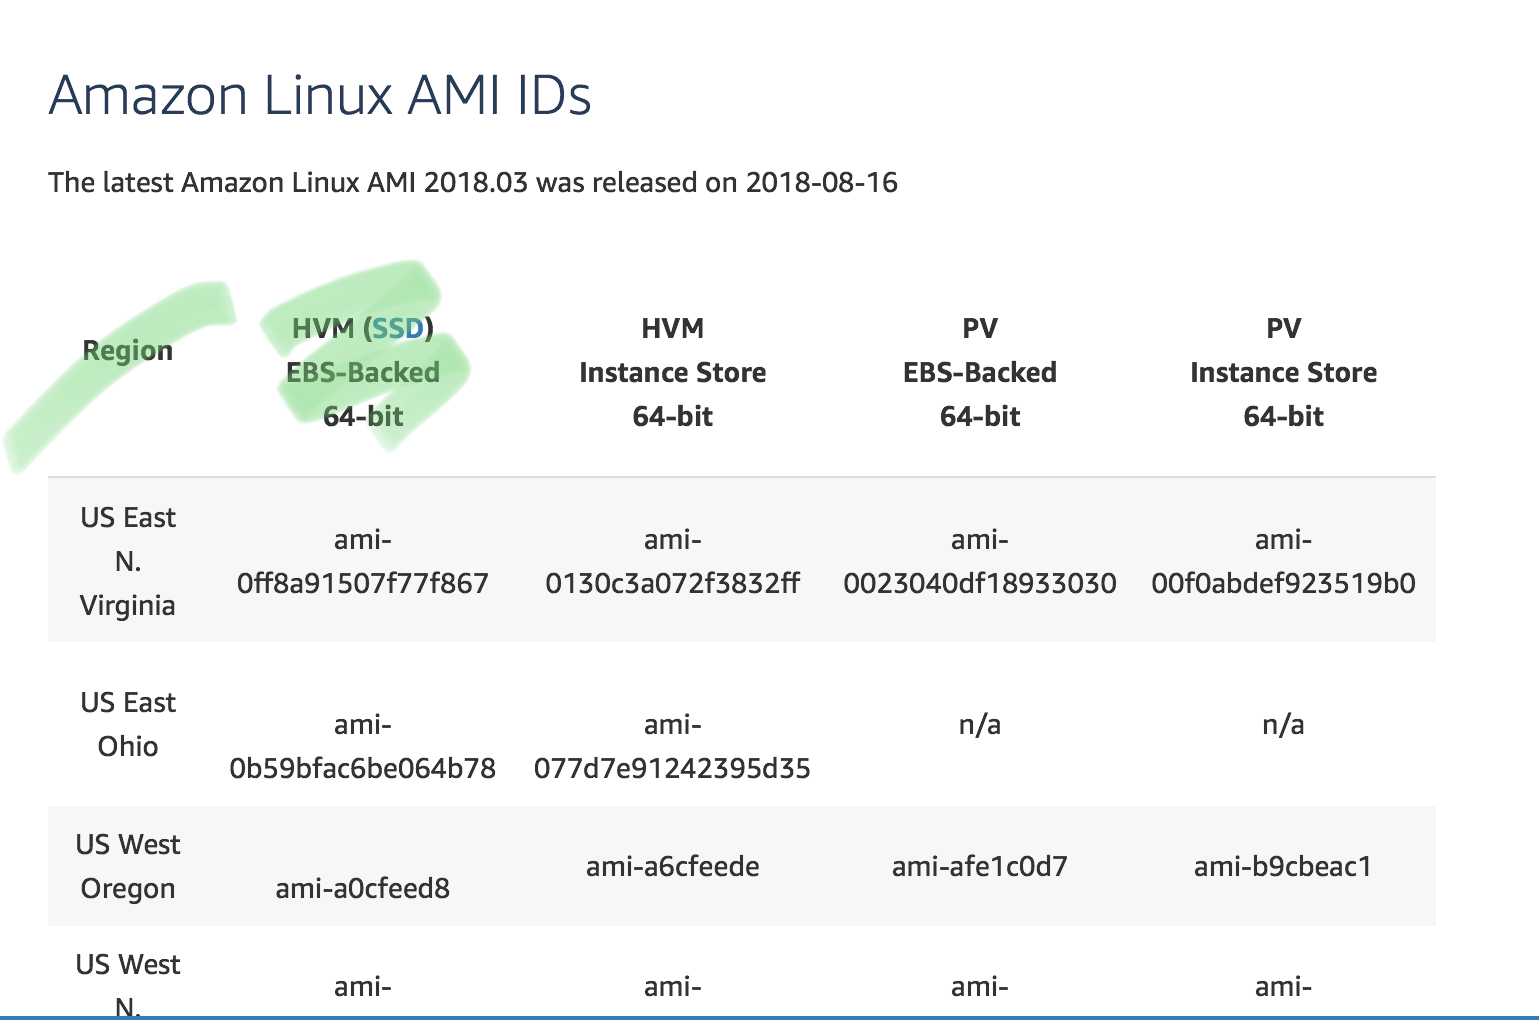
Where did I get the AMI name (instanceId)?
https://aws.amazon.com/amazon-linux-ami/
And Boom.
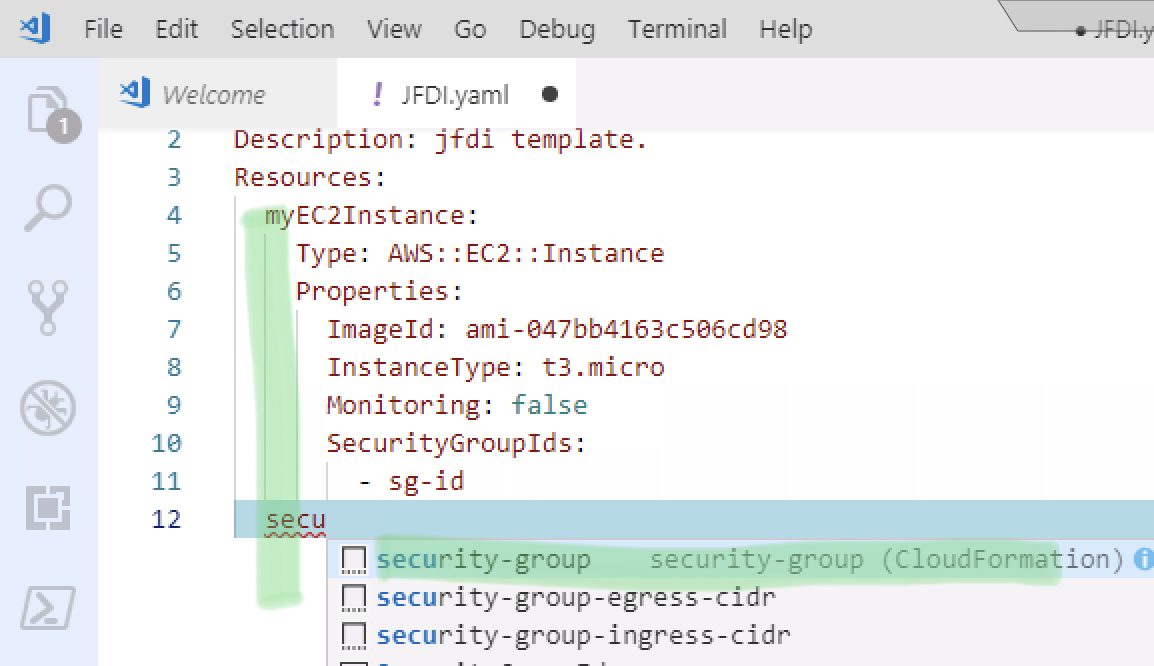
That’s enough for the EC2 instance. Let’s get the security group added.
Note how adding the security group MUST align with the EC2 instances.
Everything down that line should be a new Resource.
Now we’ve got the security group.
What use is a security group without rules though.
As per pic. Add the rule.
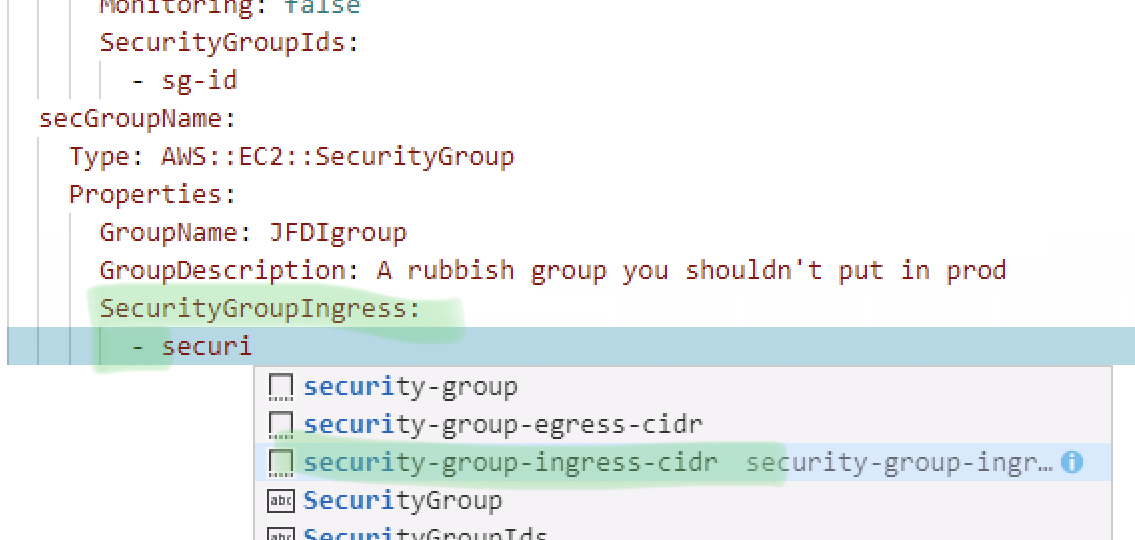
Notice it will come in misaligned.
The “-” under SecurityGroup Ingress is how you would add multiple rules. Each one Tagged with that.
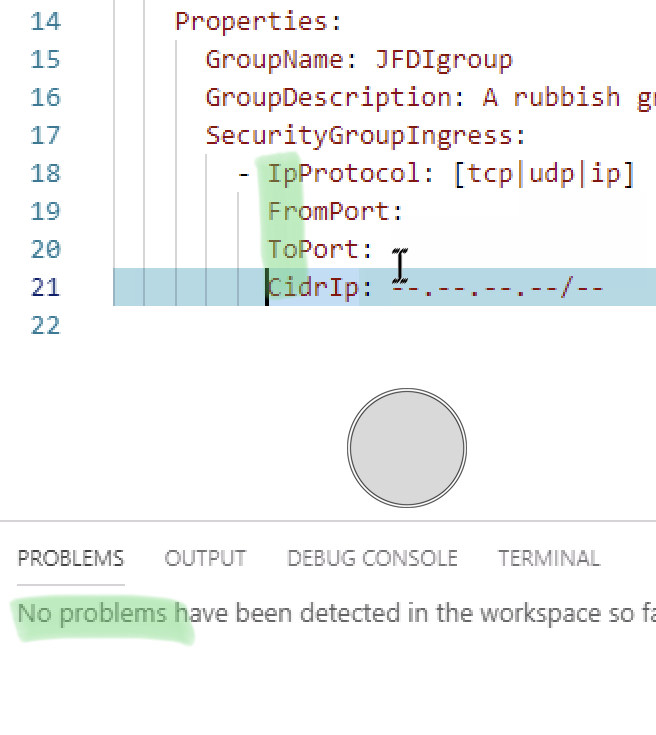
We are only having one but it’s came in misaligned. The First line for IPProtocol works ok. The next 3 are no use.

Shifted Along and looking NOICE!
Notice how the problems have vanished.
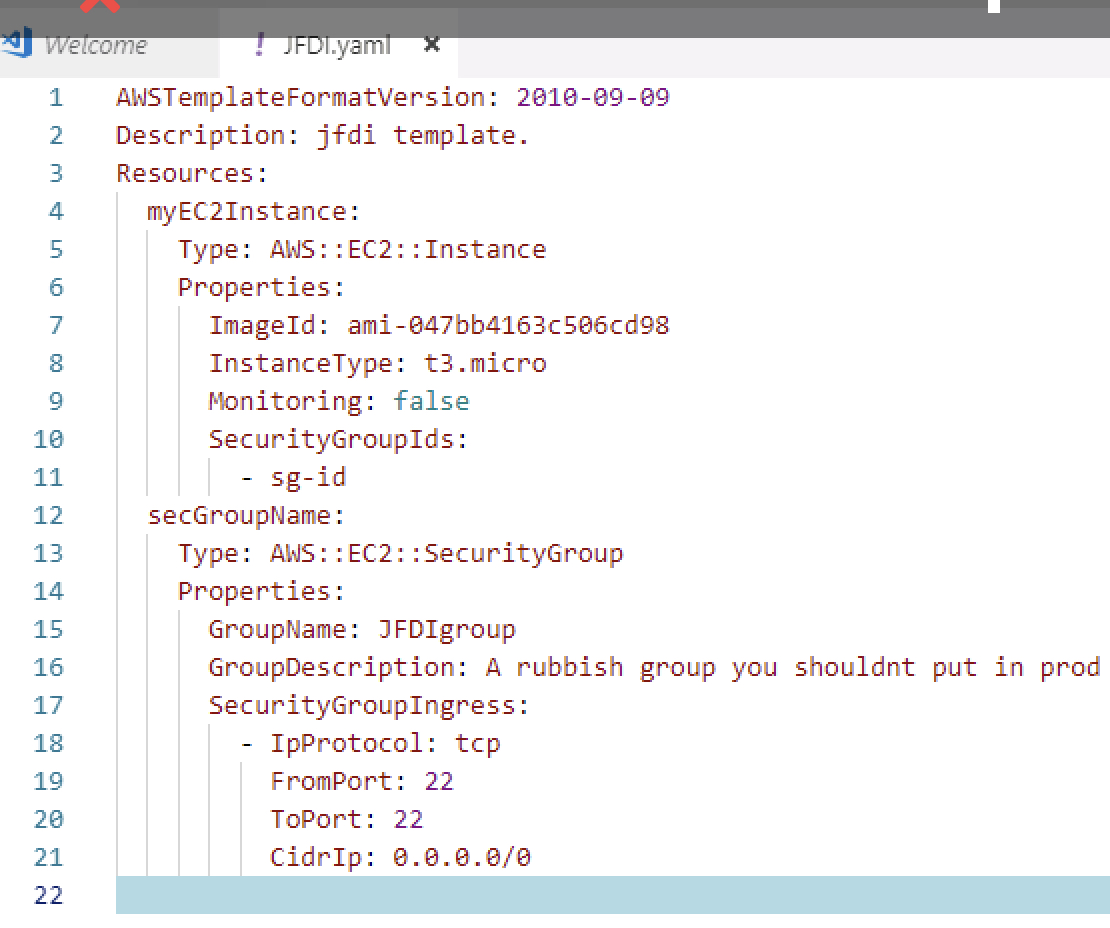
And there we nearly are.
the complete template except… for the EC2 instance.
How does it know to use that Security group ?
That SecurityGroupID doesn’t look correct.
In fact, I don’t know the SecurityGroupID because the Security Group doesn’t exist yet?!
Aw Naw!
Luckily AWS has some Intrinsic Functions that give you cosmic powers.
In this case we’re using a simple !Ref to reference something else in the template using the name of the Resource within the template. (secGroupName)
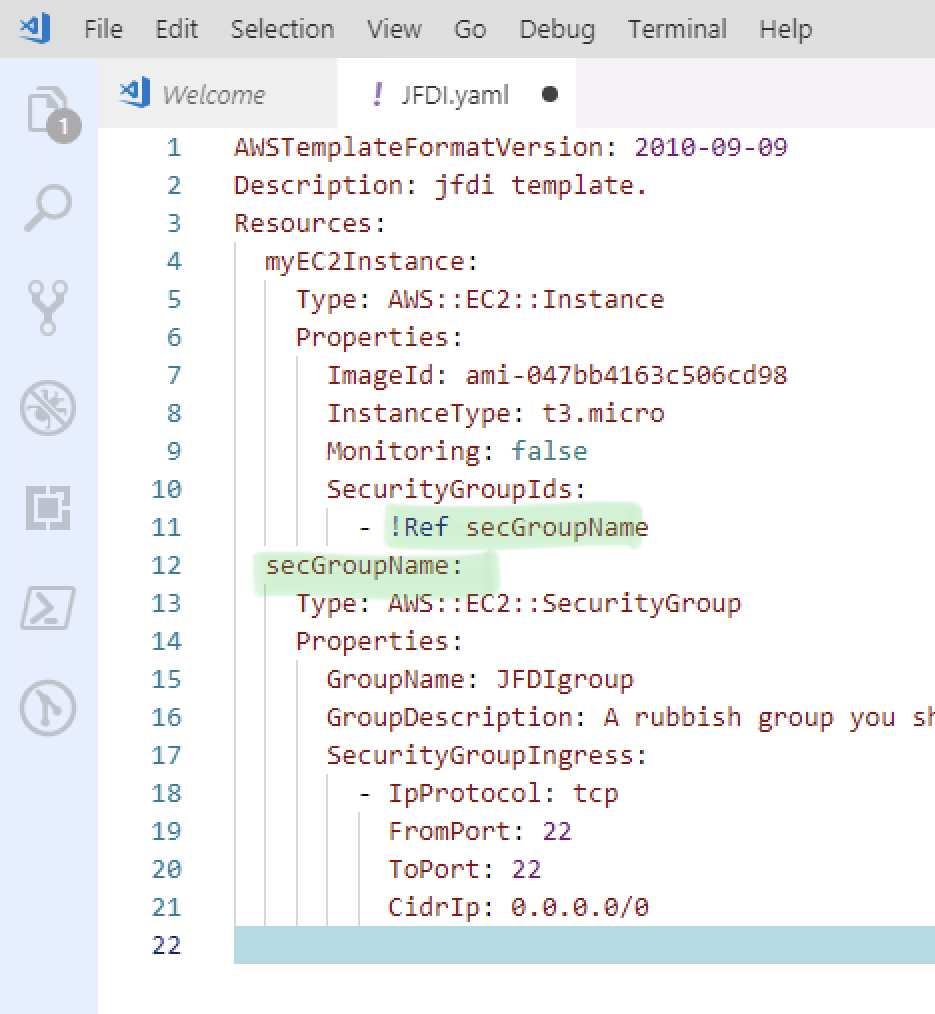
Okay, we’re done.
The linter says no problems.
Time to launch this into space.
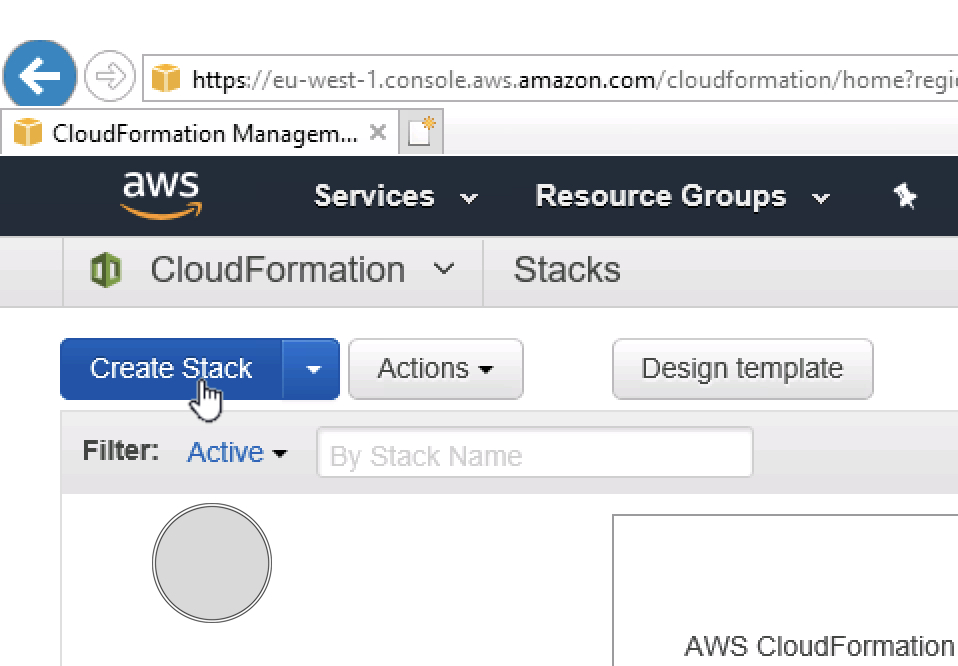
Log into AWS console.
Go To Cloudformation and Create Stack.
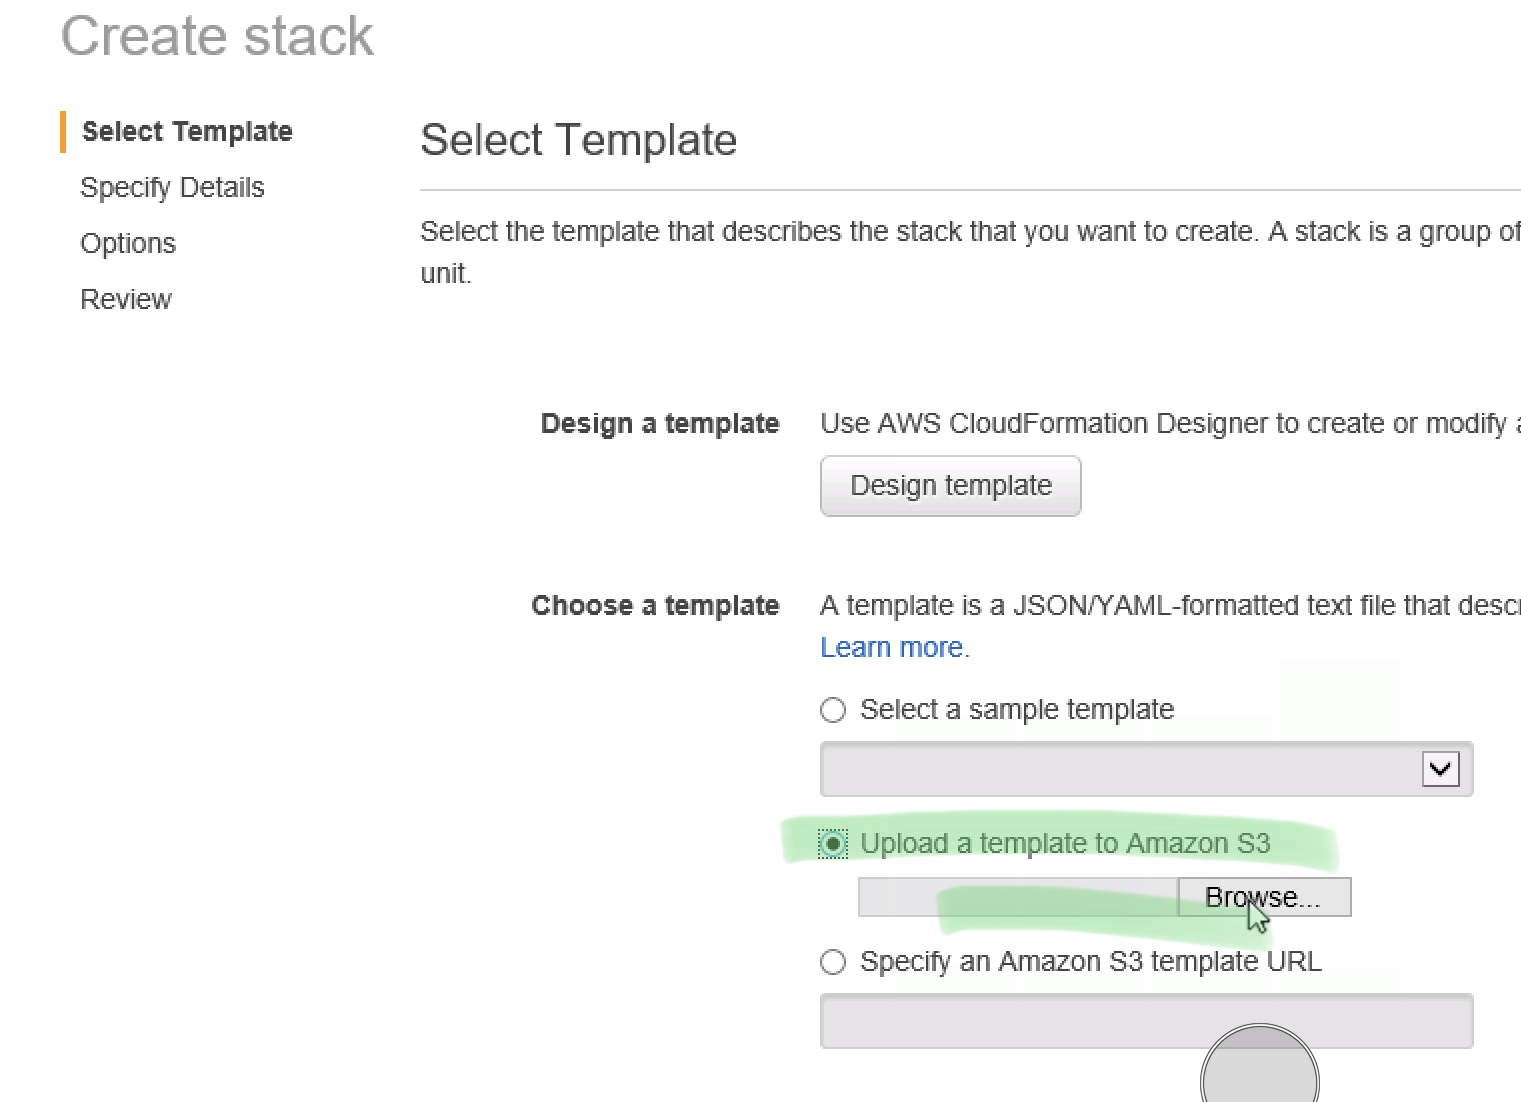
Upload the template (make sure you’ve saved it!)
Give your stack a name.
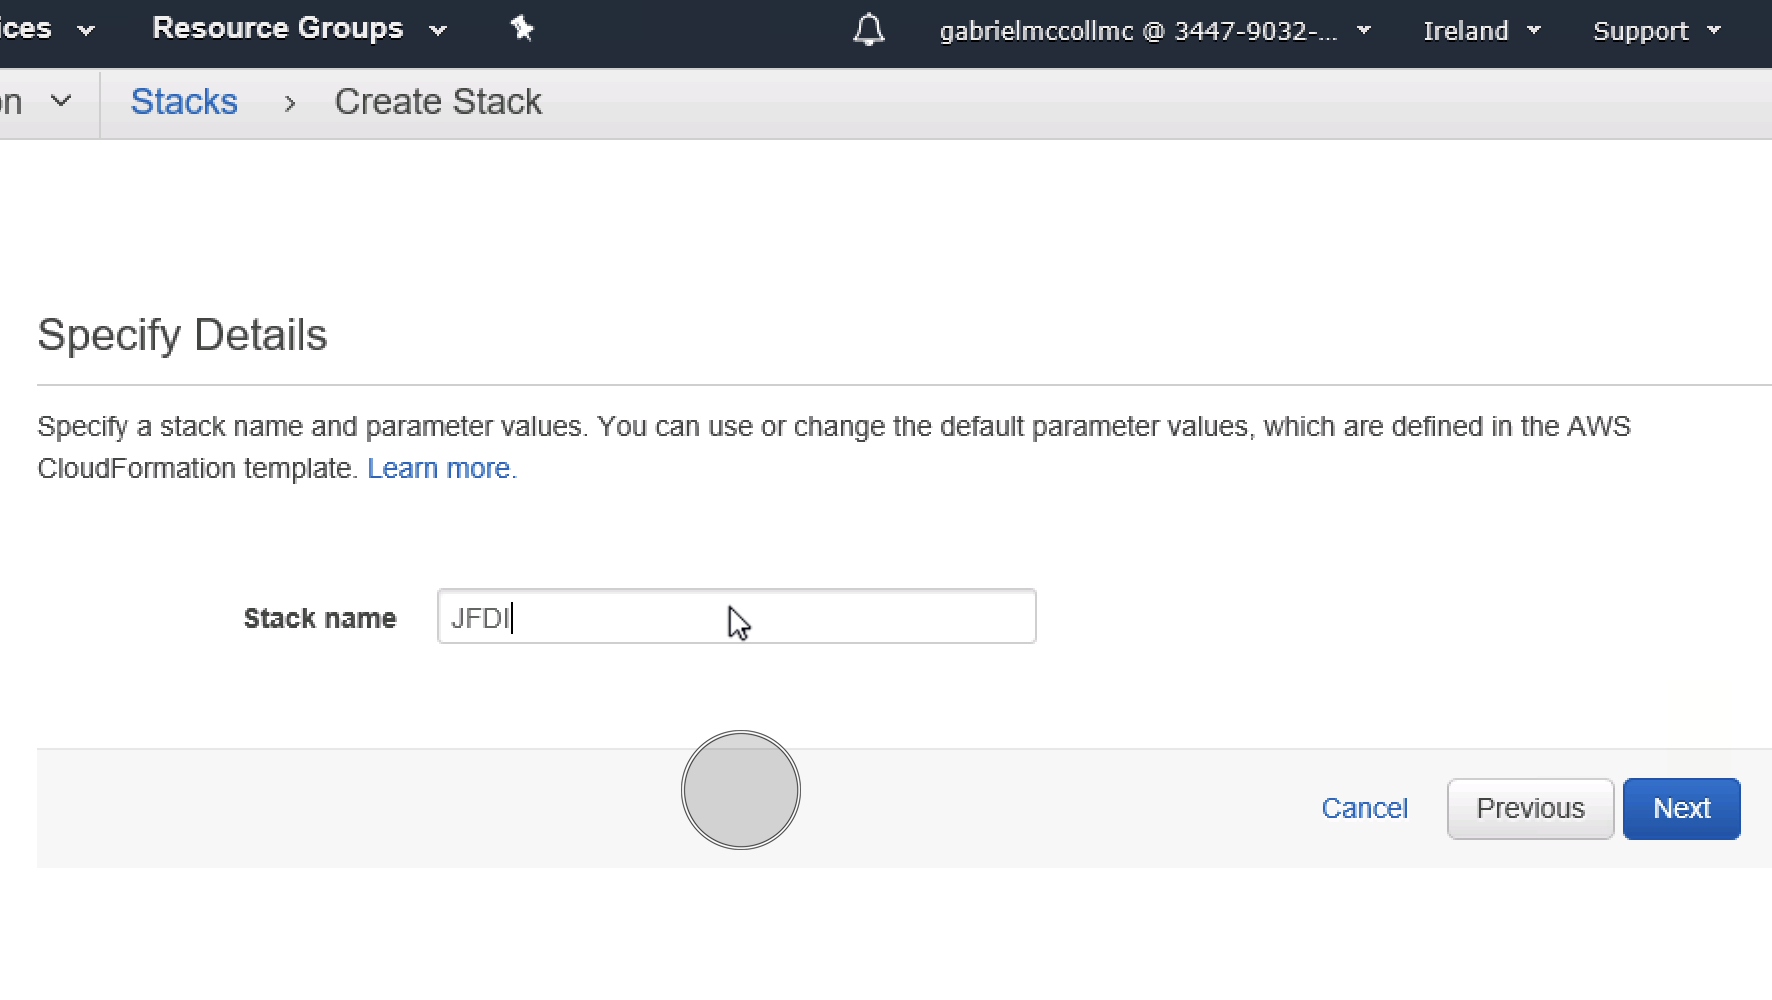
Just next through everything until Create.
Then watch this little firework display of excitement.
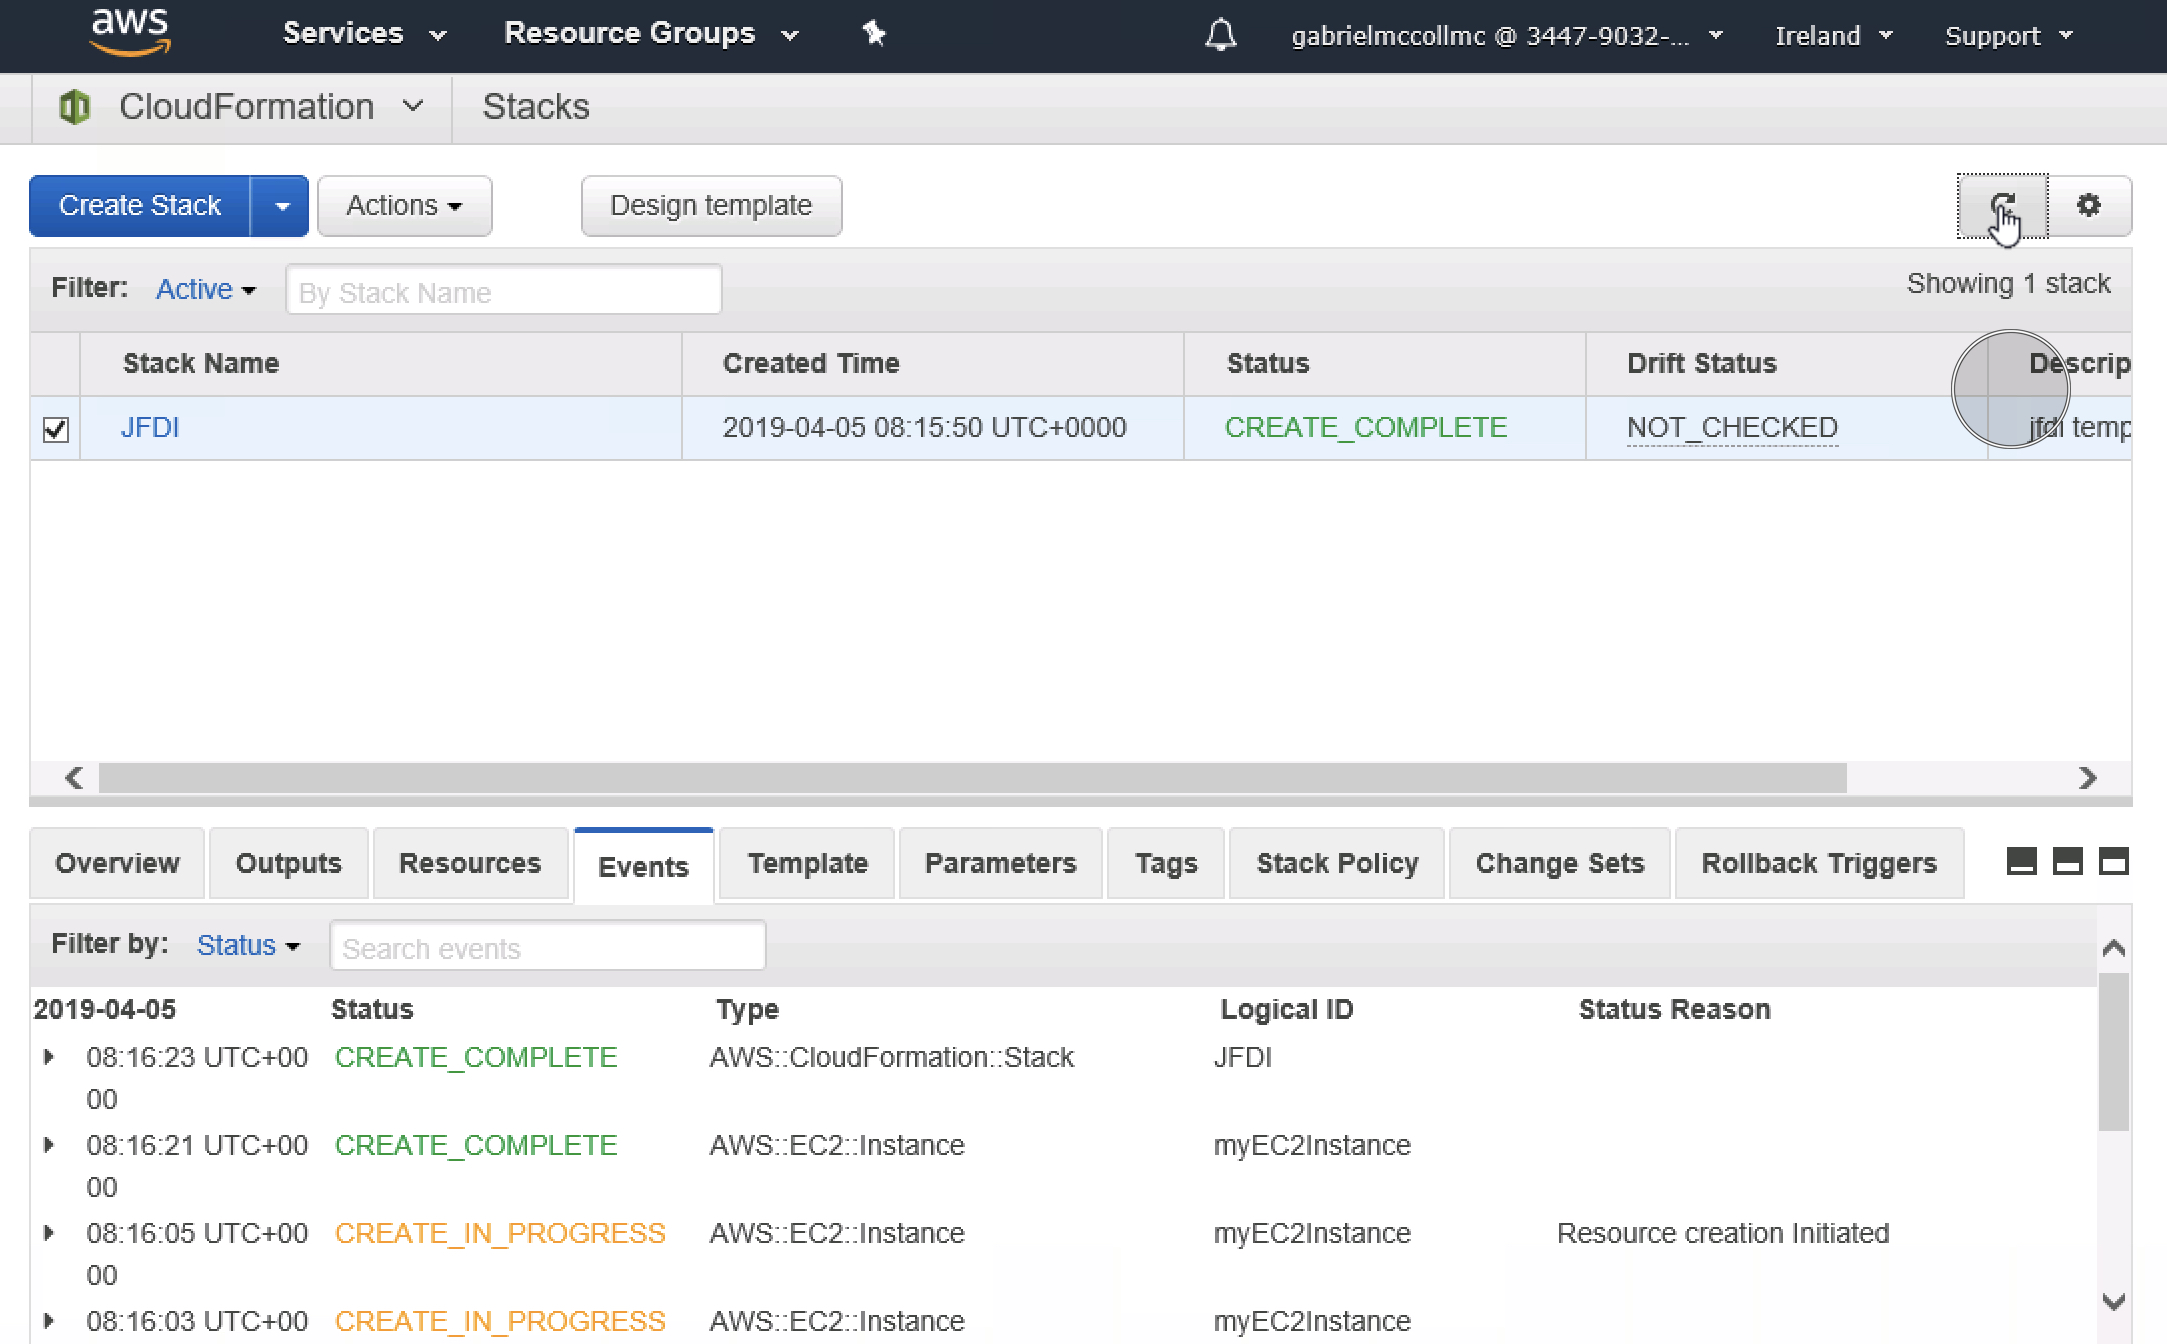
In the Cloudformation console , you can click on the stack, Resources, see what Resources were create
Ooo Sensual.
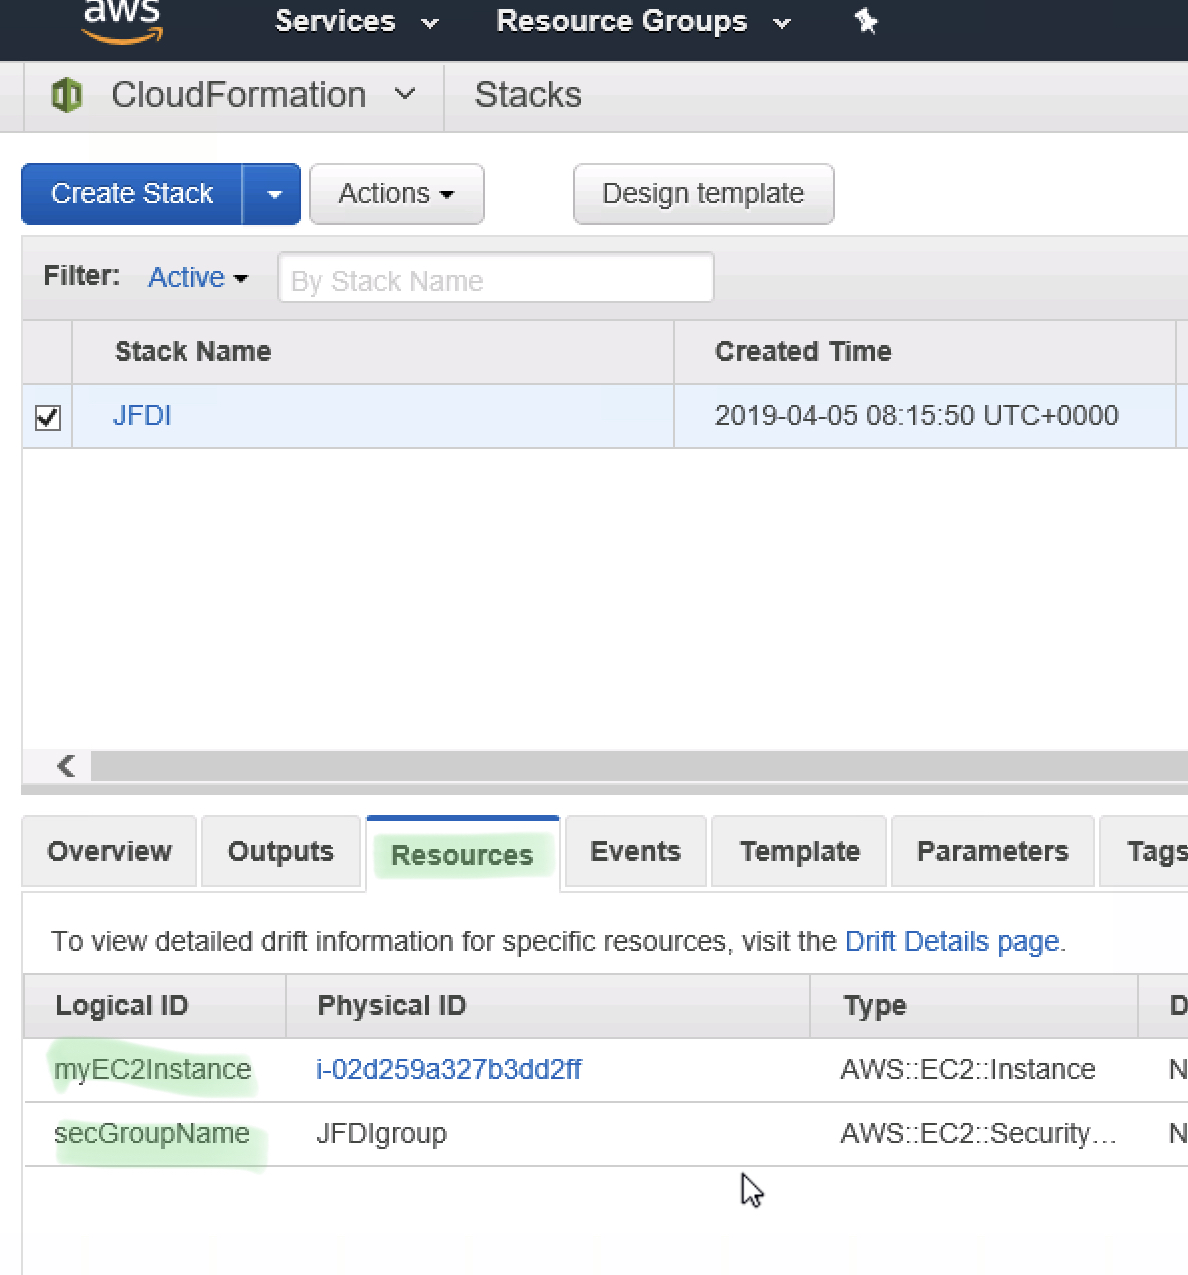
Drill into the EC2 Instance, We can see it has our Security Group
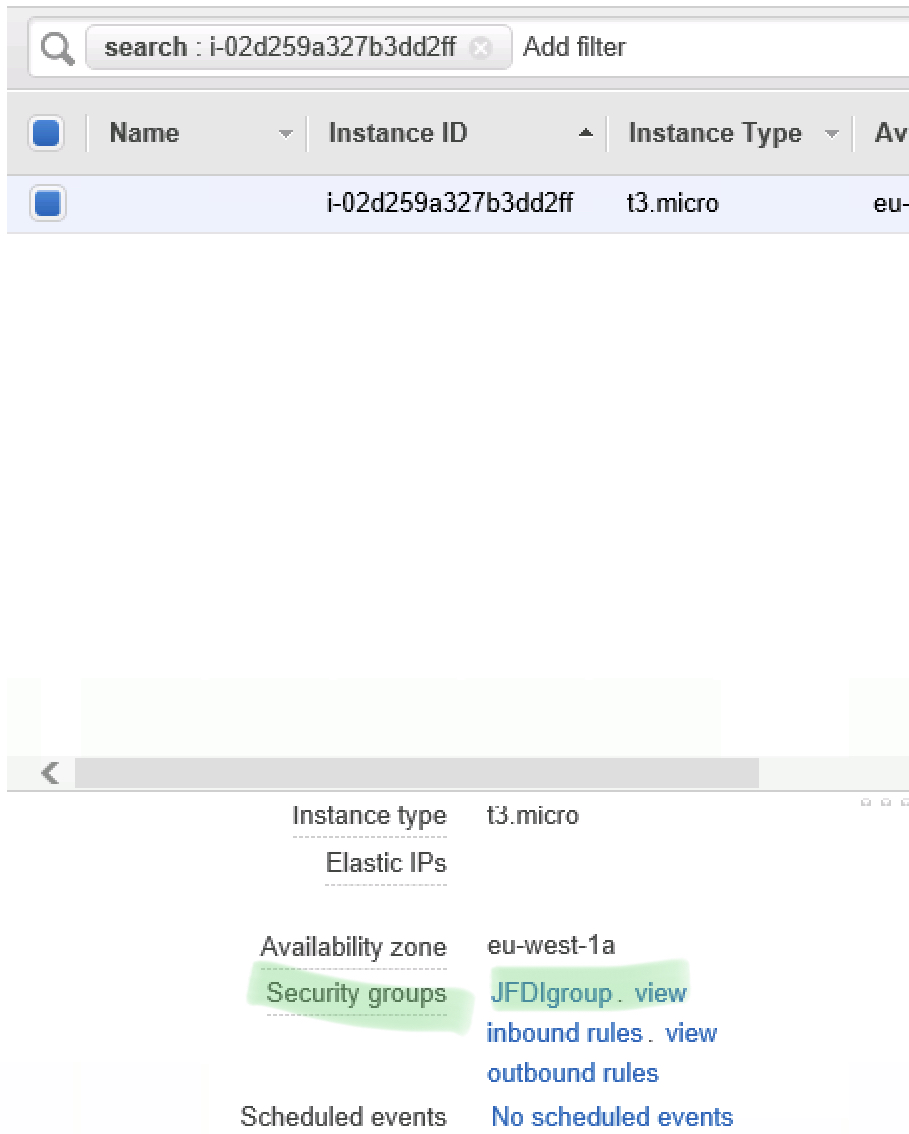
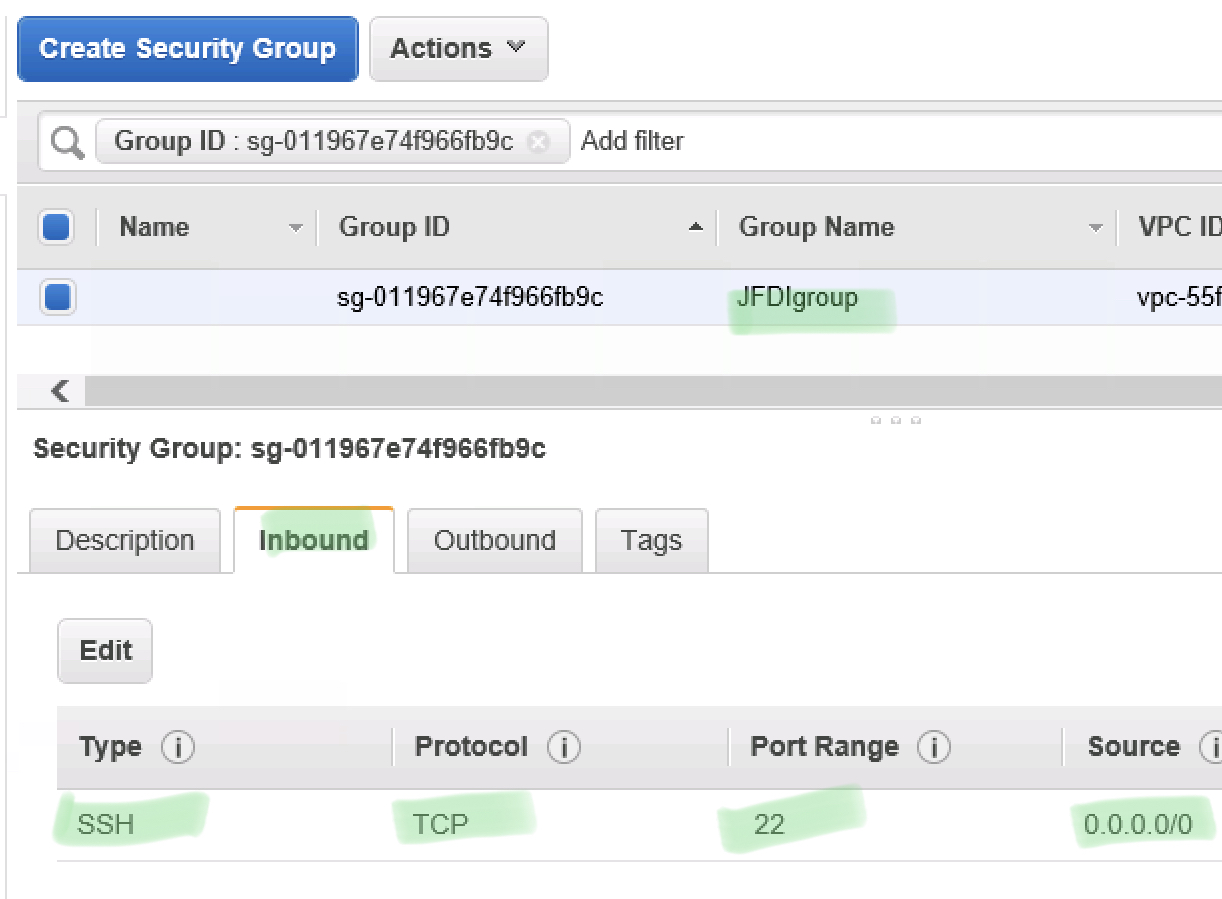
Drill into our Security Group, we can see it’s got the Security rules.
Now Delete The Stack To Clean Up the Resources !
YES!
JFDoneIt.
Well Done.
DO MORE!
Now if you want to get better and expand this example further.
- Add a VPC and Subnet
- Have it run from Codepipeline after you check in to CodeCommit.
- Use Parameters to make the template more reusable
Unnecessary buttons