The JFDI Guide to Docker on Windows
Oct 25, 2019
9 mins read
Welcome to the second in the JFDI series!
date: 2019-10-25
If you’ve read the first one, skip to Note.
There is a LOT of info out there about best practices, which tools are good, which tools are garbage and the absolute best way to do everything.
This blog series is about something different. It’s about just getting on with it and starting to try things.
It’s about trying something with the minimum of fuss without painting yourself into a corner.
It won’t be “how to be the best”, it’s “how to get past decision paralysis and just start learning”
Let me be absolutely clear - nothing I write a JFDI guide about am I an expert in - and that’s the point. You don’t have to be expert to try something. You don’t need one standing by.
If you are an expert, please let me know in response to wherever I’ve posted if I’m saying something outright wrong.
JFDI means Just Do It without Fuss. What’s that ? Those letters don’t line up? My bad..
Note
Container tutorials nearly all have a linux vibe to them. This focuses on Windows mostly because that’s what I have and am most familiar with. Also, I might tell you stuff that is bad practice for general use. That’s okay ! , this is just a taster of a few different things, in as simple format I can make it. Don’t stress. It’s playing. I just wanted to have a jenkins container on windows for easy messing on my local laptop.
Agenda
We’re gonna get an existing image of windowsservercore, install chocolatey,git and jenkins on it. I’ll point out a few gotchas I got hit with because bad. Hope it works, connect to it and check for sure, and then… WE RIDE!
Requirements
- Visual Studio Code
- Docker for Desktop (or anything else you’ve got like a VM with docker on it from AWS or Azure). You need Win10 Pro or Enterprise if you’re windows for Hyper-V. That link has all the explanations.
- Docker extension for VScode
- About an hour or less. (can be sliced up. 15 mins per section or whatever)
- Internet connection
- mild bravery
Optional
- DockerHub account - free for pushing your completed container.
Out of Scope explanations:
- using containers for production use. This is JFDI, it’s about just having a taste.
Wot’s it all about
What is a container? A miserable pile of dependencies and an app basically.
You know how you can get a portable exe, stick it on a usb key and plug it in and it’ll work on any machine basically, you don’t need to install or install .net, it just works ?
Well containers are a virtual version of that. You can package an app all up, or isolate up stuff.
No more spinning up a whole server just to run one small app.
Containers let you smash more stuff onto the same hardware, and that’s good because hardware is the bottleneck of scale and elasticity.
I’m not going to go into huge detail because I don’t know any huge detail.
Let’s crack on !
Hubba Hubba
Much like Powershell modules, chocolatey packages or linux packages, Images are kept in a repository and are available to download. The main one is Docker hub and it’s all defaulted when you install Docker for Desktop. You can make up your own private Repo’s of course. That’s out of scope. aka I dunno.
So you get an Image and use it to copy out as many containers using that image as you wish.
The Image is the cookie cutter, the containers are the cookie. GIMME 18 WEBSITES, STAT!
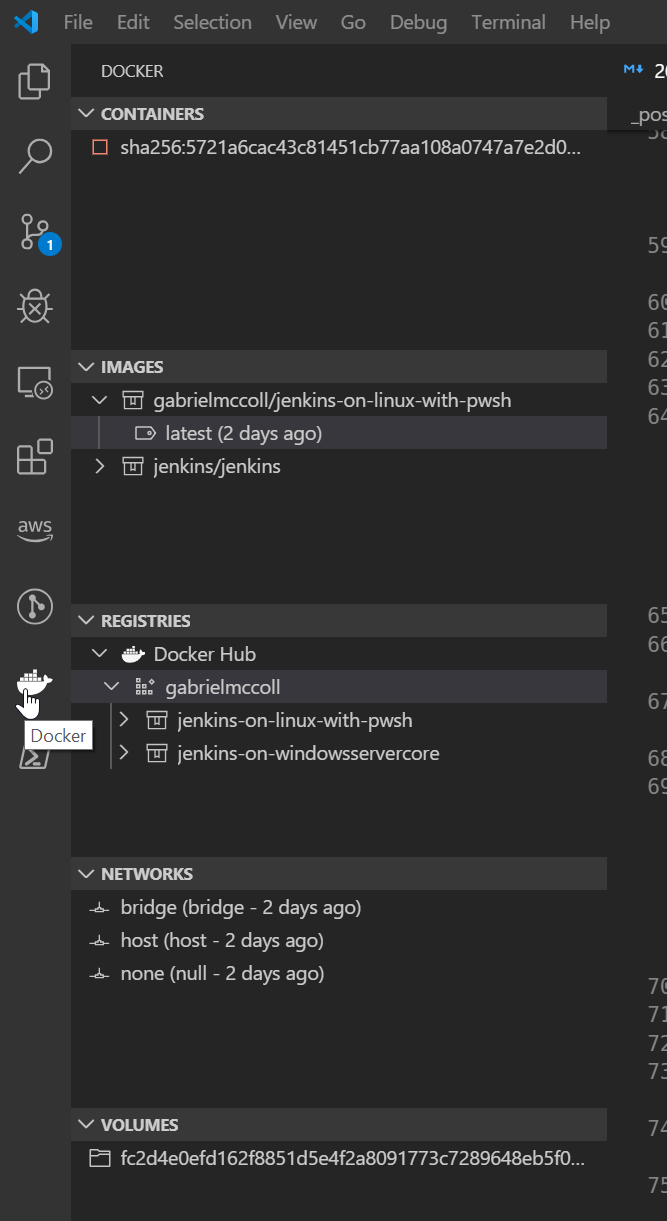
Docker is all commandline, but there is an almost GUI available using the Visual Studio Code Plugin. I found it very helpful to see what containers are running, my images, all that. Even better, when you use one of the abstracted commands, it shows you what’s happening for the real command. Remember, we’re learning, no point in being completely ignorant. see: git GUI programs.
Images are like Ogres
What’s in an image ? well it’s layers of software.
When we get our base image of Windows Server Core, it might already have a few layers.
We’ll add at least one when we install all our stuff. Maybe more, I’ll explain at the time.
Each layer is stuff done to the image. Each layer makes the image bigger.
We write a little script called a Dockerfile and it tells Docker how to make the image.
You say ‘get this image, install this stuff onto it, make a new image called blah, or keep the same name and tag it’
tags? You’ve never mentioned tags before. I know !, I forgot. Am new remember.
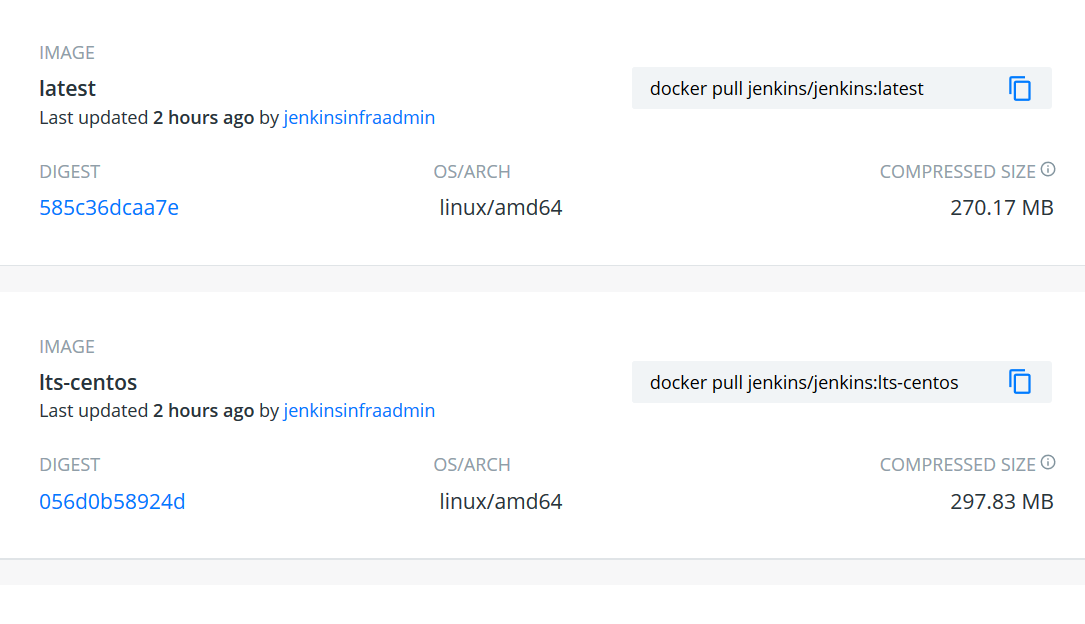
Each imagename comprises of the repository name, the image and a tag.
The newest generic version usually is tagged ’latest’ but you can see special versions for different distros or whatever.
There are WAY better sources of info out there and I’ll post at the end but lets just get on with it now.
Let’s FDI ! - make sure you did all the requirements or this is pointless.
Step 1
Make a Dockerfile. ( I suggest keeping it in a git repo somewhere but maybe you’re bold) This is basically a script that tells docker what to do to build your image. it’s just dockerfile. it’s not got an extension after or anything.
A dockerfile means you can reuse the script if the base Windows Server image gets updated and just remake your custom blend by running the dockerfile again or with a small tweak.
You’re free to just use mine of course but for learning it might be better type it out.
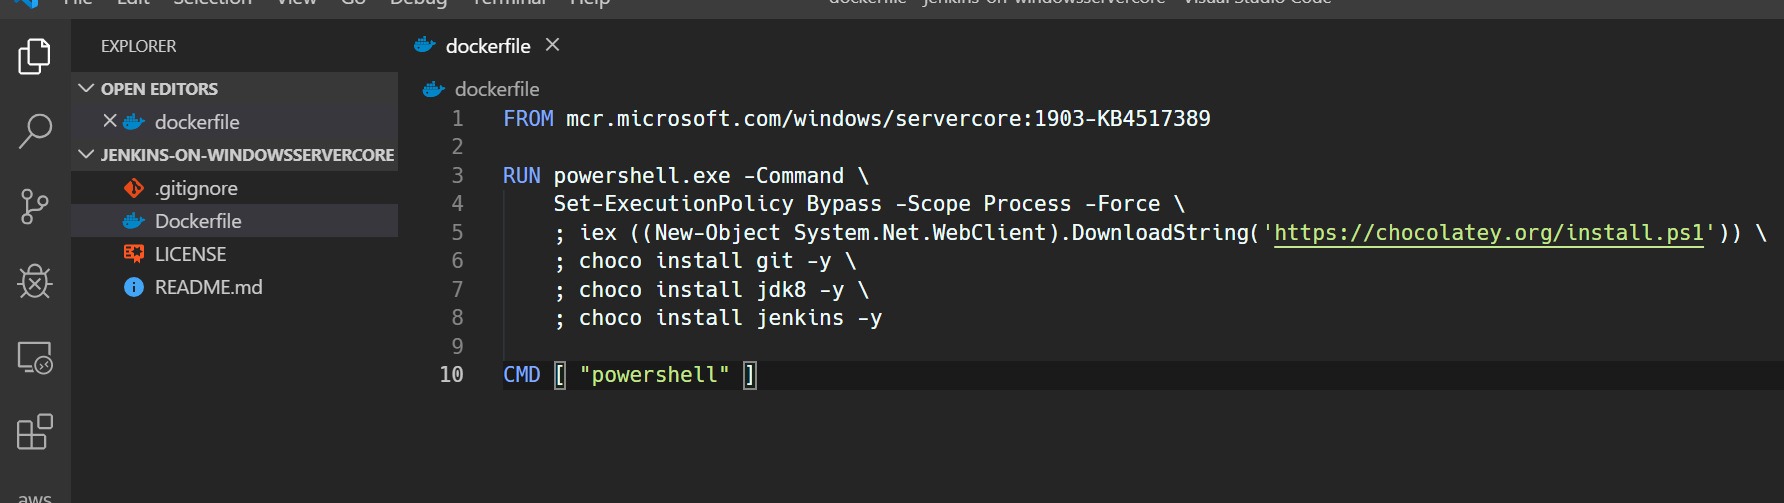
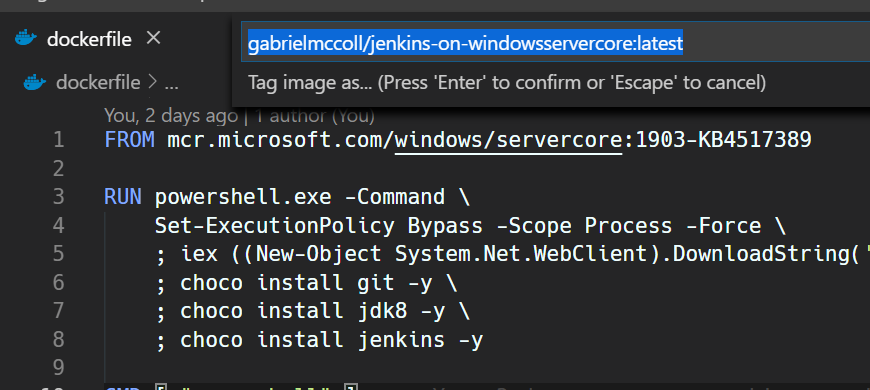
What the following says is
‘run the official microsoft servercore image, 1903 version with important update, download it if you need to from dockerhub (standard docker behaviour’
FROM mcr.microsoft.com/windows/servercore:1903-KB4517389
‘Spin up a container from that image and, using powershell, install chocolatey. Then using chocolatey, install git, java and jenkins’ the \ means ignore the next character. so \ then enter will let you use linebreaks without breaking the code.
You can do multiple RUN statements. Each makes its own layer tho, increasing size.
RUN powershell.exe -Command \
    Set-ExecutionPolicy Bypass -Scope Process -Force \
    ; iex ((New-Object System.Net.WebClient).DownloadString('https://chocolatey.org/install.ps1')) \
    ; choco install git -y \
    ; choco install jdk8 -y \
    ; choco install jenkins -y
This next part is telling what command to run when a container made from this image is spun up. CMD has nothing to do with cmd on windows. This means when I spin up the container, run powershell.
CMD [ "powershell" ]
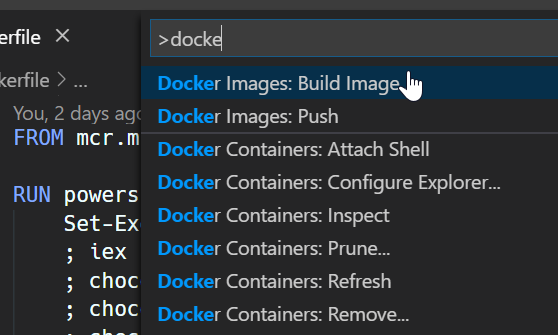
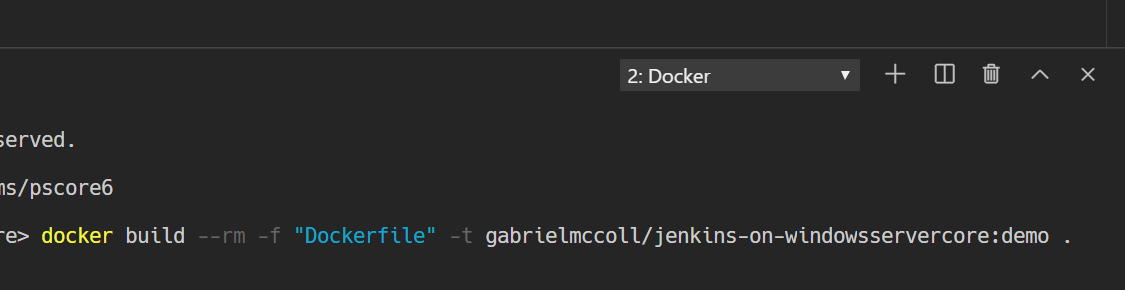
Okay , we have a dockerfile. lets run it to build
F1 or CTRL+SHIFT+P to bring up the menu and pick the docker build option
the name is your repository / the image name : tag
If you don’t have a repo on docker hub yet, don’t sweat it. use that name structure anyway.
You might get an error saying it can’t find chocolatey.org. This is because the container can’t use your internet connection. Skip to appendix at bottom for fix. Then come back here.
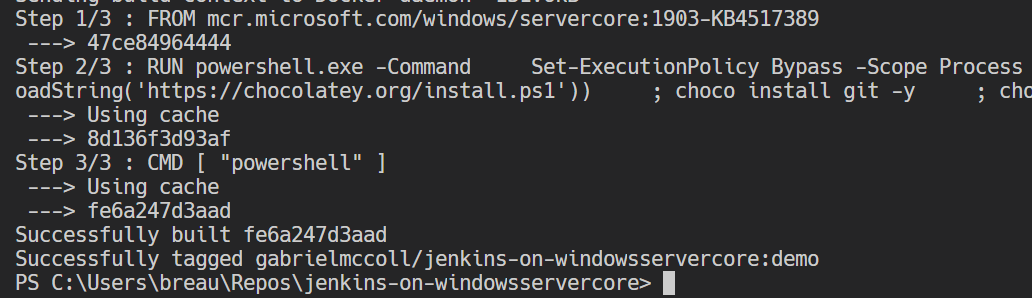
Hopefully that works and you have a new image created. Have a look and see on the Docker area! GOGOOGO
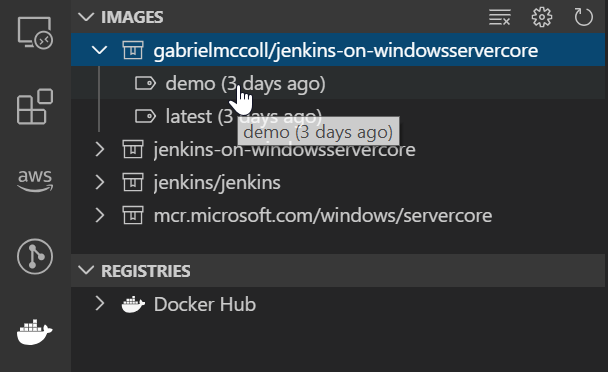
If it’s there, let’s run it interactively. Right Click it and do the obvious.
It will run the docker cmdline in the terminal window. Wait until it changes to a powershell prompt in a clean window. Remember we told it to run Powershell when it starts.

Get-Childitem shows we’re in the container. Not our own C: drive.
Now either ipconfig or (Get-NetIPAddress -AddressFamily IPv4).IpAddress to get the IP address.
172.22.123.50 was mine.
So Jenkins should be running on 8080 (the default). Open a browser and http://172.22.123.50:8080
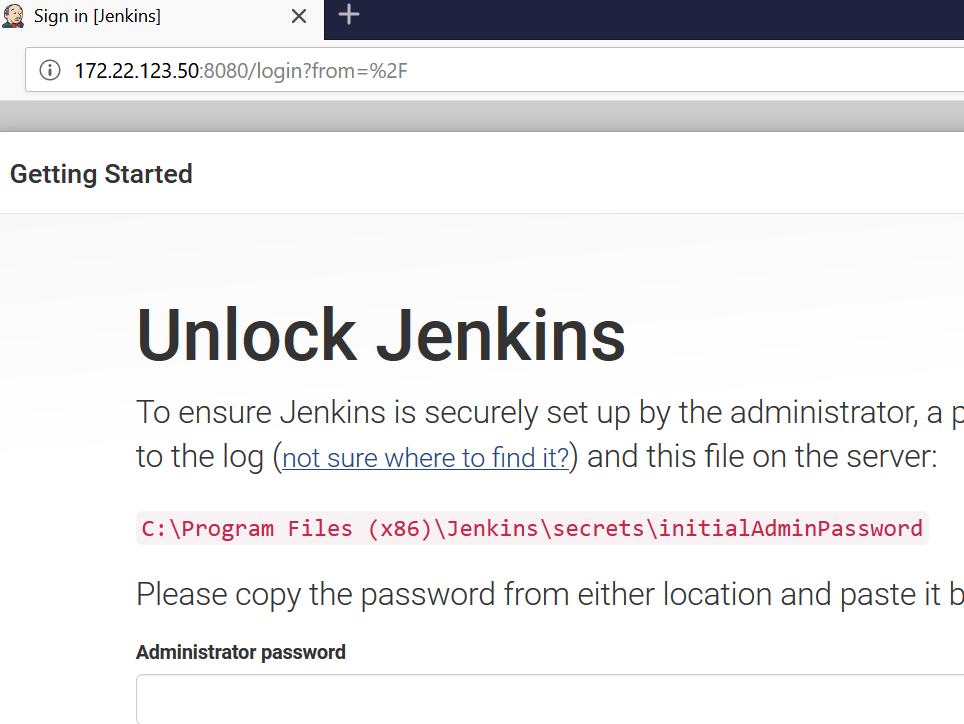
TA-DA!!!!!!
Now you have some options.
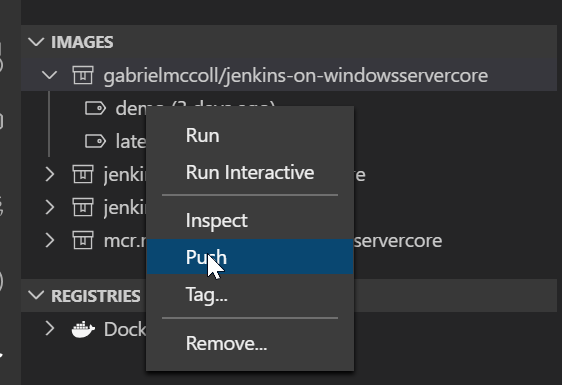
First off , go to the Docker tab in VScode and Stop and Remove the containers (NOT THE IMAGES)
And if you have a docker hub setup, you can push the image you made to your repo
Well done !
You’ve got a reusable dockerfile. You made your own image. Okay you’re not an expert or production ready, but those feet got wet and you learned stuff.
You can do anything.
Some Links that can be useful
Microsoft docs for Docker for Windows
Networking on Docker for Windows
Appendix A - Container can’t connect to internet
This took me like half an hour to find the fix for. You need to open Powershell and change the metric on your internet lower. I have heard this can cause problems in having containers talk to each other later so just remember you did it.
Mine was called ‘wifi’ not ‘Wi-Fi’
This often happens when there are multiple networking adapters (Ethernet, Wi-Fi, etc.) present on the host. The priority of these adapters needs to be configured properly in order for the Windows networking stack to correctly choose gateway routes. You can fix this by setting your primary internet-connected networking adapter to have the lowest InterfaceMetric value. Try these Powershell commands from an elevated console:
Get-NetIPInterface -AddressFamily IPv4 | Sort-Object -Property InterfaceMetric -Descending
Again, you want your host’s primary internet-connected network adapter to have the lowest InterfaceMetric value. Use this command to make the change (example assumes primary adapter InterfaceAlias is ‘Wi-Fi’):
Set-NetIPInterface -InterfaceAlias 'Wi-Fi' -InterfaceMetric 3
That should do it. If your host’s primary network adapter is bridged because you have an External virtual switch setup in Hyper-V, then you will set the external virtual switch to have the lowest InterfaceMetric value. You can verify your routing tables by using this command (the last line should show the primary adapter’s gateway address along with it’s ifMetric value):
Get-NetRoute -AddressFamily IPv4
Unnecessary buttons