Serverless Container Agent for Azure DevOps
Jul 5, 2020
12 mins read
Serverless Docker Container CI CD Azure DevOps Pipelines Build Agent
OMG THE BUZZWORDS.
Do you SEE the Buzzwords in that title.
You must be so PUMPED to read this blog.
The SEO will be off the charts.
Now I’m not some expert in any of these techs, but I’ve got something cool working and I thought I’d share it since I’ll probably forget how all this works in a few months and need something to refer to.
I’ve also wrote some scripts to make this easy for you to replicate yourself.
It’s the kind of project you could easily tweak to be a lot better.
In fact, unless you have a jekyll blog to build, then you’re almost definitely better to replace the Yaml I provide here with just a simple starter yaml that does a hello world in bash or something. That small simple change will let you use this framework provided to get going.
You can always tweak the dockerfile too and just reduce the amount of stuff it installs, but be careful, some of it is required by the agent. Check the Appendix at end for links.
Let’s take a look at the chart:
triggers); B -->|Starts Azure
Container instance| E(Container Registers
ADO Build Agent); E --> F[Build Agent
Available]; A[Push code to Azure Devops
or Github Repo] --CICD --> F; F --> |Build Completes,
Agent Unregisters|G[Azure Container
shuts down]:::Filled; subgraph Container Action Z(Pulls image from
Dockerhub) --> E end classDef Filled fill:#f96;
It’s quite nice I think.
Alas it’s a bit deceptive, am such a weasel.
I won’t cover how to make this work with Github but it would take you very little time to get it working I think and I need to leave something for an easy follow up blog.
I recommend you come back to the chart if you’re ever confused as to where you are in the process. This is quite a long blog.
Rather than keeping a build server running full time, it spins up as needed, with isolated dependencies and then vanishes. In the cloud lands, that lowers your cost a lot usually, most build servers aren’t running anything close to max capacity.
The docker image I’m using and sharing is so I can build this very blog you’re reading. It’s built in Jekyll. It’s a Linux container.
It is not optimal because I’m not that good at docker yet but it works and the dockerfile is there and you can tweak it to do whatever you want.
I did my best to make it secure by not exposing passwords / keys etc if possible.
If anyone has suggestions for improvements, then please let me know at Github.
Yes I need to update versions. Especially interested in tips to reduce size !
I’ll hook you up with the yaml file I use too. I am good to you.
Things you can do to customize this for your needs:
Just off top of my head, there will be more
- change which Programs are installed by Apt.
- change the Gems that get installed into the container for your jekyll blog.
- change the webhook to an Agentless step in a Pipeline (I didn’t know about those when I started).
- completely swap which container gets pulled in.
Requirements
- Azure Account (Not free but v v cheap)
- Azure Function
- Azure Key Vault
- Azure Container Instance
- Azure DevOps account (free)
- Azure Repo
- Azure Pipelines
- Ability to create Service Hooks
- Weak lemon drink.
- Probably about half an hour to set this up. Maybe a lot longer though if everything is new to you.
- Fairly basic knowledge of Azure DevOps, Docker, Yaml, Powershell and Azure.
Optional
- Dockerhub account
- Docker skills if you want to tweak. (not covered here)
Steps
This is where I lay out the steps so I remember what I was typing before I went off on a ramble.
- Create the Azure Function and Key Vault in Azure.
- Create the Service Hook in Azure DevOps (ADO).
- Create two PATs in ADO.
- Add PATs to Key Vault.
- Add the code to the function.
- Test.
FINALLY - Let’s GOOOO
You can do this all the Gui if you like but I’m providing Powershell scripts you can use for a lot of it.
The easiest way is just to paste the whole thing into an Azure Cloud Shell.
Tweak the names or any other settings you want. I’ve tried to make it easy.
NOTE: I’ve embedded the scripts in this page but you can get them HERE. If the ones in the page don’t get updated, the one’s at this link will.
The Azure Resources
$ResourceGroupName = "ContainerAgentJK"
$keyVaultname = 'ContainerAgentKeyjk'
$StorageName = 'buildcontsajk'
$FunctionAppName = 'buildcontfunjk'
$location = "Uk South"

#Create Resource Group
New-AzResourceGroup -Name $ResourceGroupName -Location $location
#Create Key Vault
New-AzKeyVault -Name $keyVaultname -ResourceGroupName $ResourceGroupName -Location $location -Sku Standard
#Create Storage Account that the Function App needs
New-AzStorageAccount -Name $StorageName -ResourceGroupName $ResourceGroupName -Kind StorageV2 -SkuName Standard_LRS -AccessTier Cool -Location $location
#Create the Function App with a System Assigned Managed Identity.
New-AzFunctionApp -ResourceGroupName $ResourceGroupName -Location $location -OSType Windows -Runtime PowerShell `
-IdentityType SystemAssigned -StorageAccountName $StorageName -Name $FunctionAppName -FunctionsVersion 3 -RunTimeVersion 6.2
#Give the Function App permission to get Secrets from the Azure Key Vault we just made.
$id = (Get-AzFunctionApp -Name $FunctionAppName -ResourceGroupName $ResourceGroupName).IdentityPrincipalId
Set-AzKeyVaultAccessPolicy -VaultName $keyVaultname -ObjectId $id -PermissionsToSecrets get -BypassObjectIdValidation
##Also give it permission to contribute to the Resource Group you made so it can create the Azure Container Instance
New-AzRoleAssignment -ObjectId $id -RoleDefinitionName "Contributor" -ResourceGroupName $ResourceGroupName

##Give your own account permissions to see stuff on the keyvault
$id = $env:ACC_OID
Set-AzKeyVaultAccessPolicy -VaultName $keyVaultname -ObjectId $id -PermissionsToSecrets list,get,set,delete -BypassObjectIdValidation
You’ll see stuff that looks like this
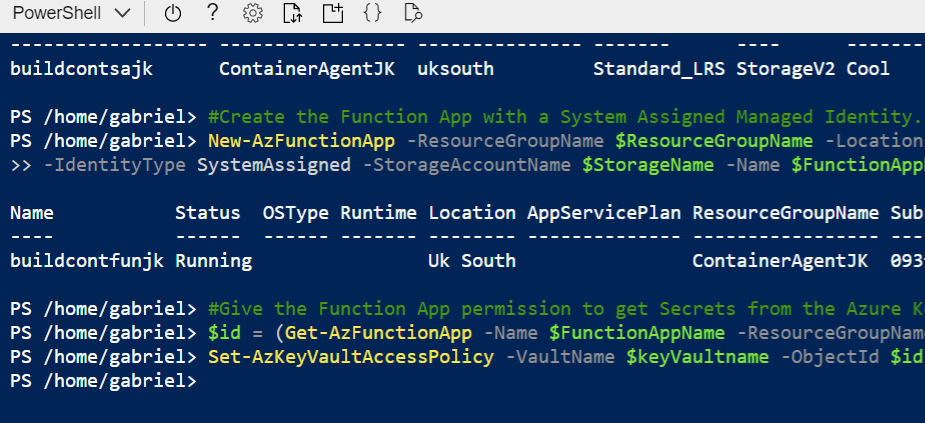
Obviously it’s possible you get an error, just read the error and have a think. If you’re still stuck, get to github and log an issue.
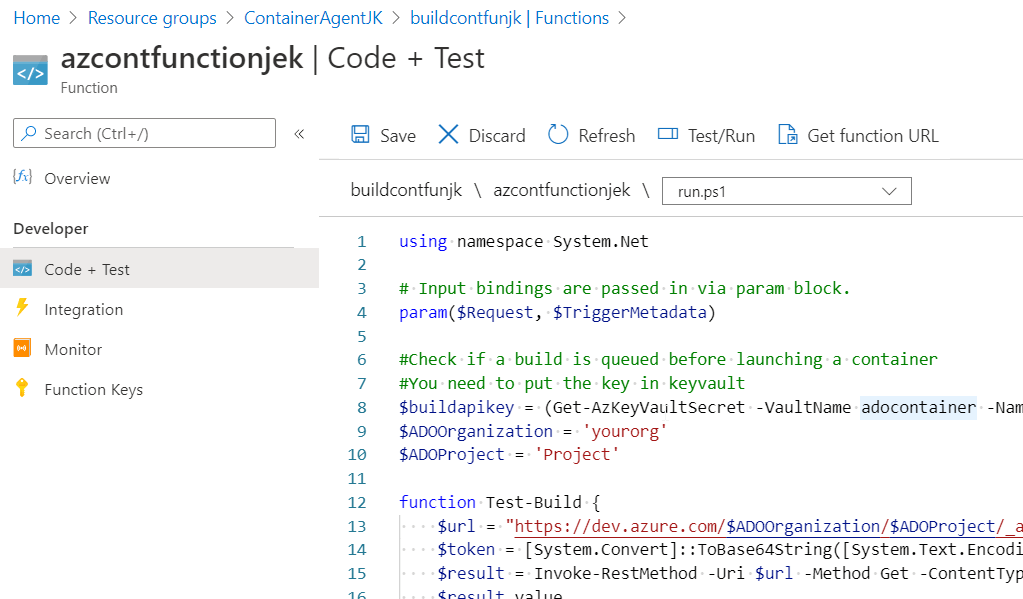
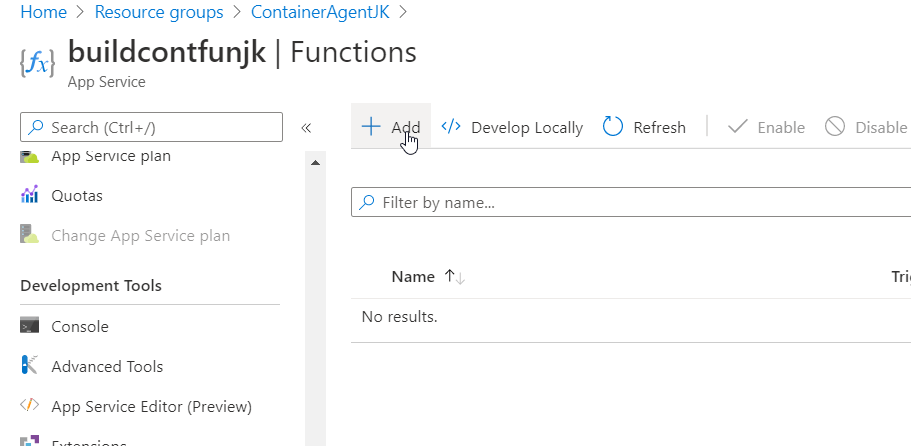
The Function
Unfortunately there doesn’t seem to be a way to Powershell create the actual Function App. What you create is an Function App Plan with Consumption billing. You then need to actually add in the Function and the code to go with it. Let us consult these pictures from which I will merely sprinkle a few comments in, as needed. Please note these pictures are from a slightly earlier version of the scripts so will look slightly different.

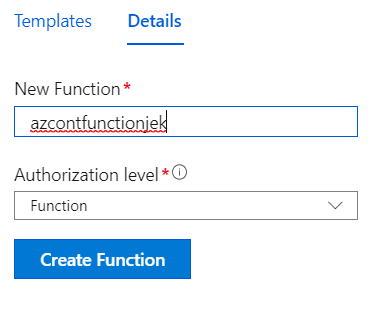
Once you have your Function App with HTTP Trigger created. Get the Run.Ps1 code (in the code block a little below and) and paste the contents in.
NOTE: You will want to fill in your personal ADO details and maybe change the Agent Pool name, all up to you.
None negotiable though is updating the Key Vault name in this script to match the name of the Key Vault you created
Get the function URL.
DO NOT SHARE IT
It contains the key to trigger the function so it could be used nefariously.
Keep it to use in the Service Hook (next section)
using namespace System.Net

# Input bindings are passed in via param block.
param($Request, $TriggerMetadata)

#Check if a build is queued before launching a container
#You need to put the key in keyvault
$VaultName = 'ContainerAgentKeyjk'
$buildapikey = (Get-AzKeyVaultSecret -VaultName $VaultName -Name GetBuilds).SecretValueText
$ADOOrganization = 'Your Org' #Not the full URL
$ADOProject = 'Jekyll Blog' #or whatever the project name is.
$resourcegroupname = 'ContainerAgentJK'
#You don't really need the body anymore, was left over from the sample but it shows how this could be worked on more.
$body = "This HTTP triggered function executed successfully. Pass a name in the query string or in the request body for a personalized response."

#Make the name unique for the registered agent
$rand = Get-Random -Maximum 1000000
$agentname = 'dockerlinuxjek' + $rand

#environmental variables for the docker container to use once it's spun up
$dockerenv = @{
    AZP_URL="Https://dev.azure.com/$ADOOrganization/" ;
    AZP_AGENT_NAME=$agentname ;
    AZP_POOL='Jekyll';
    AZ_SECRET_NAME='adocontaineragent';
    AZ_KEY_VAULT=$VaultName
}

$containerinstancename = 'jekyllcontainerado2'

#the API token needs to be in base64 to use to invoke the web request
function Test-Build {
    $url = "https://dev.azure.com/$ADOOrganization/$ADOProject/_apis/build/builds?statusFilter=notstarted&api-version=5.1"
    $token = [System.Convert]::ToBase64String([System.Text.Encoding]::ASCII.GetBytes(":$buildapikey"))
    $result = Invoke-RestMethod -Uri $url -Method Get -ContentType "application/json" -Headers @{Authorization = "Basic $token"}
    $result.value
}

#Checks if the build is queued or not.
#This makes sure a container doesn't get spun up without a build.
#potentially wracking up costs.
$count = 0
do {
    $buildqueued = Test-Build
    if ($null -eq $buildqueued) {
        start-sleep 3
        $count = $count + 3
        if($count -gt 9) {
            Write-Error 'No Build is queued therefore no container will be started'
            exit
        }
    }
} until ($null -ne $buildqueued)

# Interact with query param2eters or the body of the request.
#this will be the name of the Azure Container Instance

if ($containerinstancename) {
    New-AzContainerGroup -ResourceGroupName $resourcegroupname -Name $containerinstancename `
        -Image gabrielmccoll/jekylladoagentminmistakes:latest -OsType linux `
        -RestartPolicy Never -EnvironmentVariable $dockerenv -AssignIdentity
    $body = "Started container group $containerinstancename"
}

#The first time the container group is made, this part might take a couple mins to propograte.
#Meaning your container will fail with an error message about not being able to access the key.
$id = (Get-AzContainerGroup -ResourceGroupName $resourcegroupname -Name $containerinstancename).Identity.PrincipalId
Set-AzKeyVaultAccessPolicy -VaultName $VaultName -ObjectId $id -PermissionsToSecrets get -BypassObjectIdValidation

# Associate values to output bindings by calling 'Push-OutputBinding'.
Push-OutputBinding -Name Response -Value ([HttpResponseContext]@{
    StatusCode = [HttpStatusCode]::OK
    Body = $body
})
Setting up the Service Hook
Navigate to this page in whatever ADO Project you want to use this Pipeline Agent with.
Create a new Service Web Hook
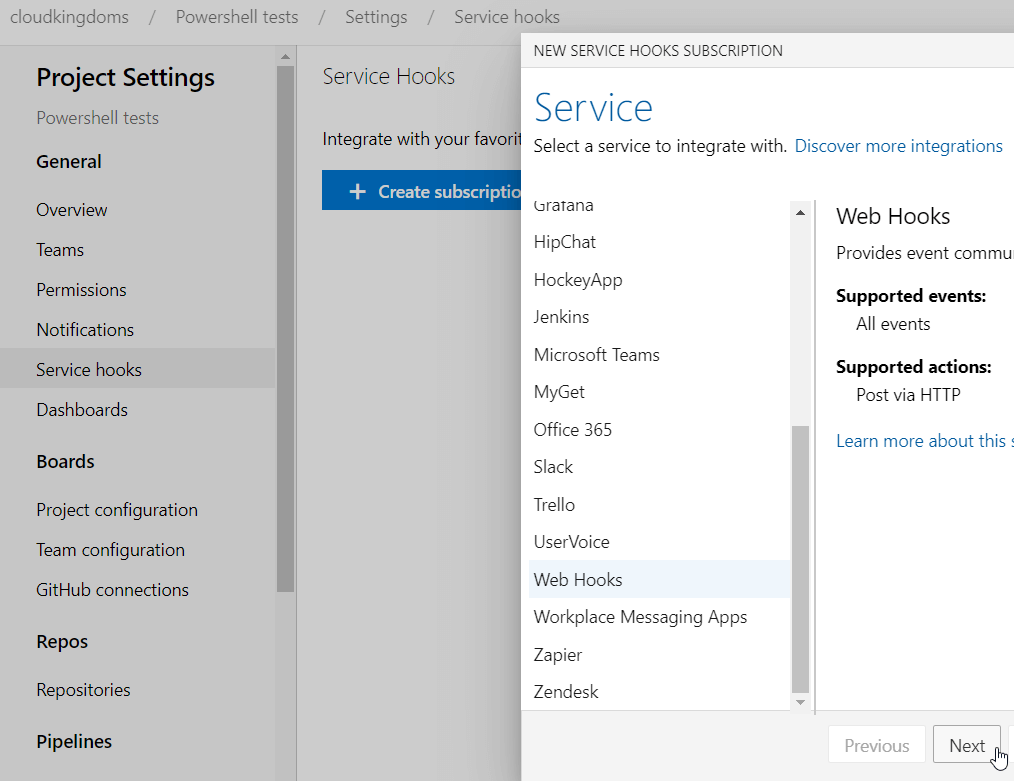
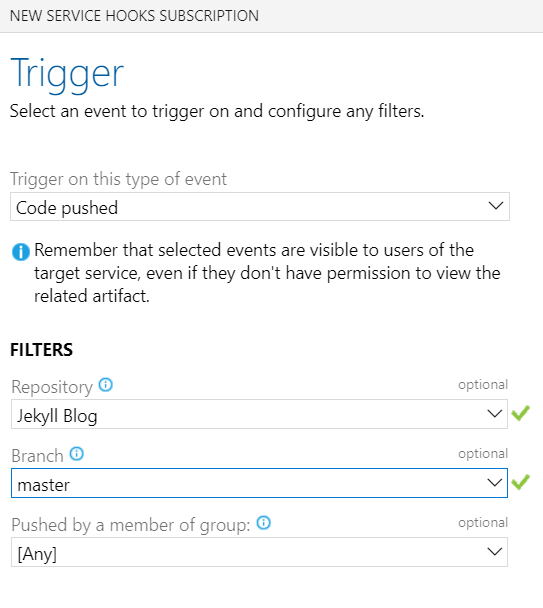
This is set to trigger, when there is new code pushed to the Master Branch.
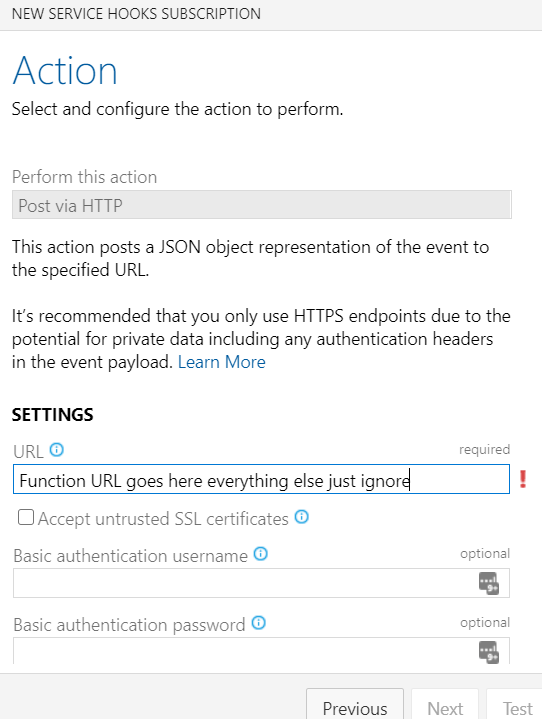
Paste in the Function URL, you should already have it, if not, go back a few pictures where it will show you.
Create the Personal Access Tokens.
Here’s a link to Microsoft’s instructions
To minimize permissions you need 2 PATs. One to read Builds. (so the Function script can see if any are queued up before launching a Container to deal with it.) One to Read and Manage Agents (so the script inside the Container can register an Agent to deal with the queued build.)
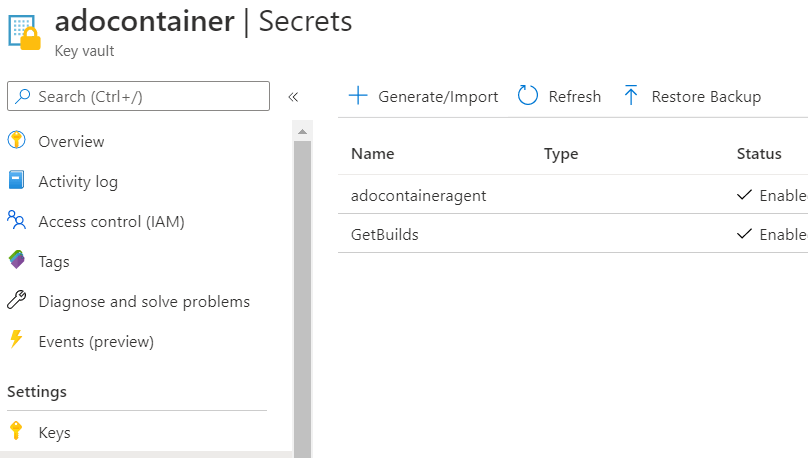
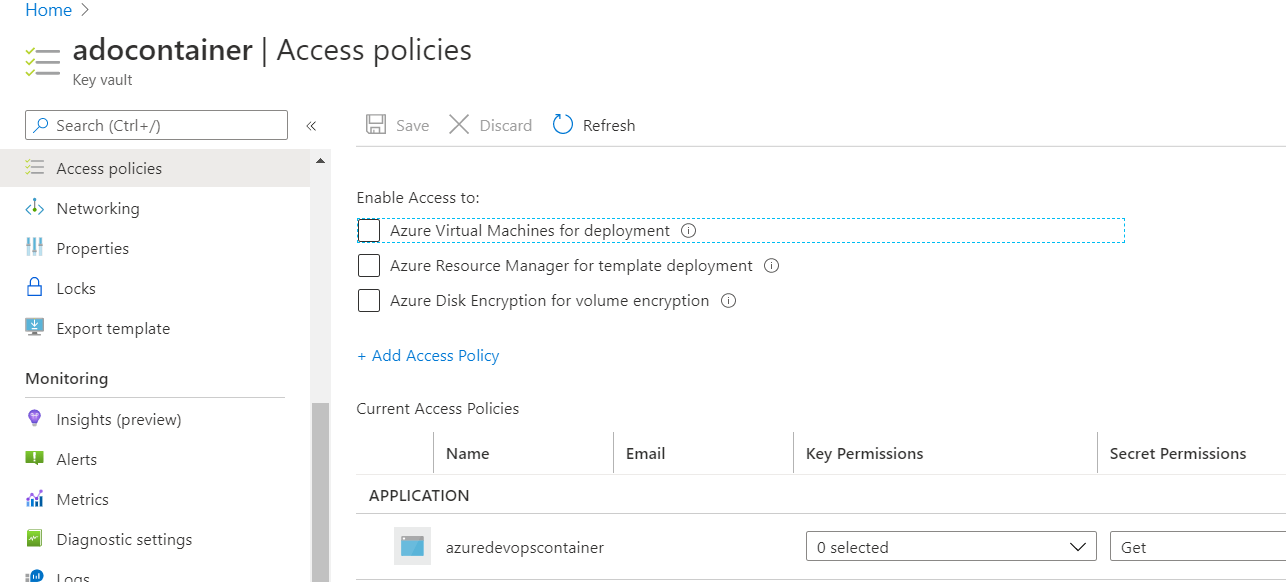
Add the Pats to the Azure Key Vault
Here’s some pictures again.
Remember to tweak the Function run.ps1 to pass in the Variables related to the name you chose for the Key Vault and the Secret.
Take a look at the Access policies and make sure the Function is showing the ability to get secrets. Your Function might be named different.
The YAML Build for Azure DevOPs
This builds my Jekyll Project. If you don’t have a Jekyll project to test building , just swap it for a simple Hello World Yaml Pipeline. (See Appendix)
resources:
- repo: self

trigger:
- master

queue:
  name: Jekyll #This is the Agent Pool specified in the run.ps1 Function

steps:

- script: 'bundle exec jekyll build -d $(Build.ArtifactStagingDirectory)'
  displayName: 'Build Jekyll Static Site'

- task: PublishBuildArtifacts@1
  displayName: 'Publish Artifact: _site'
  inputs:
    ArtifactName: '_site'
Now test the Function and see if it works.
Queue up a Build job in Azure DevOps first
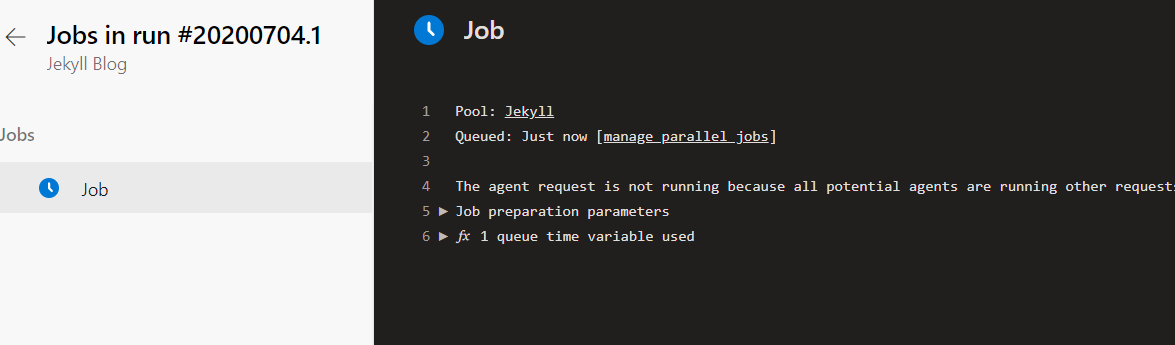
If you don’t, you should get an error that looks like this when you follow the next step.
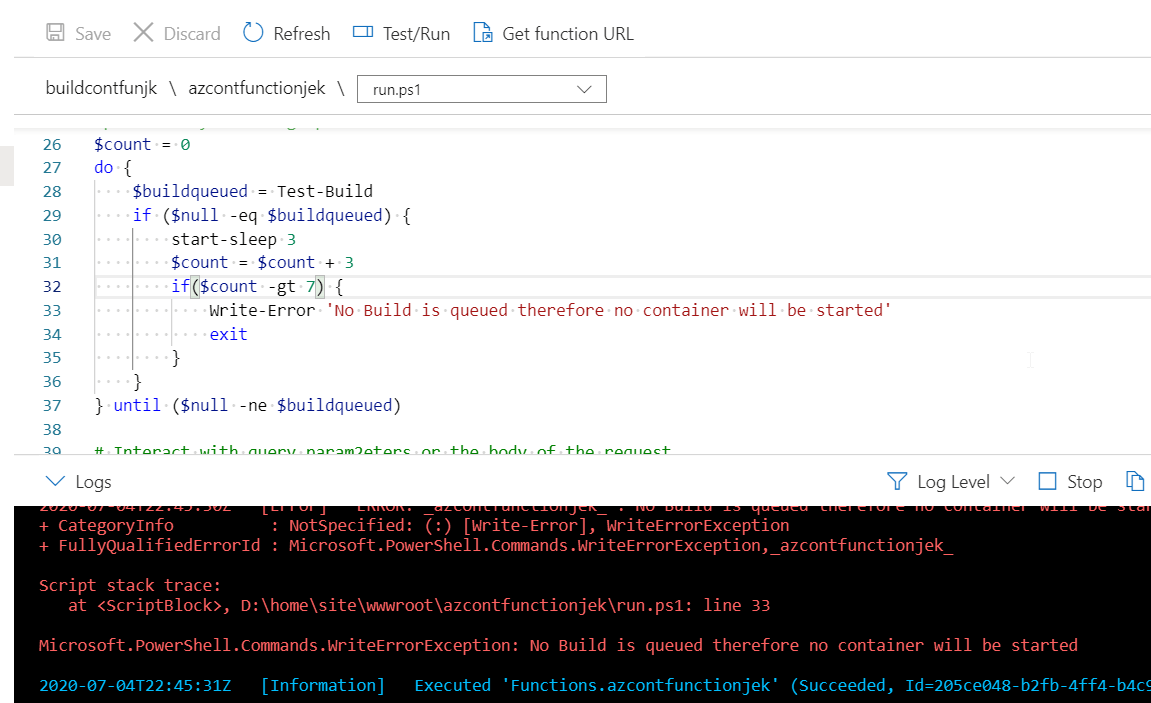
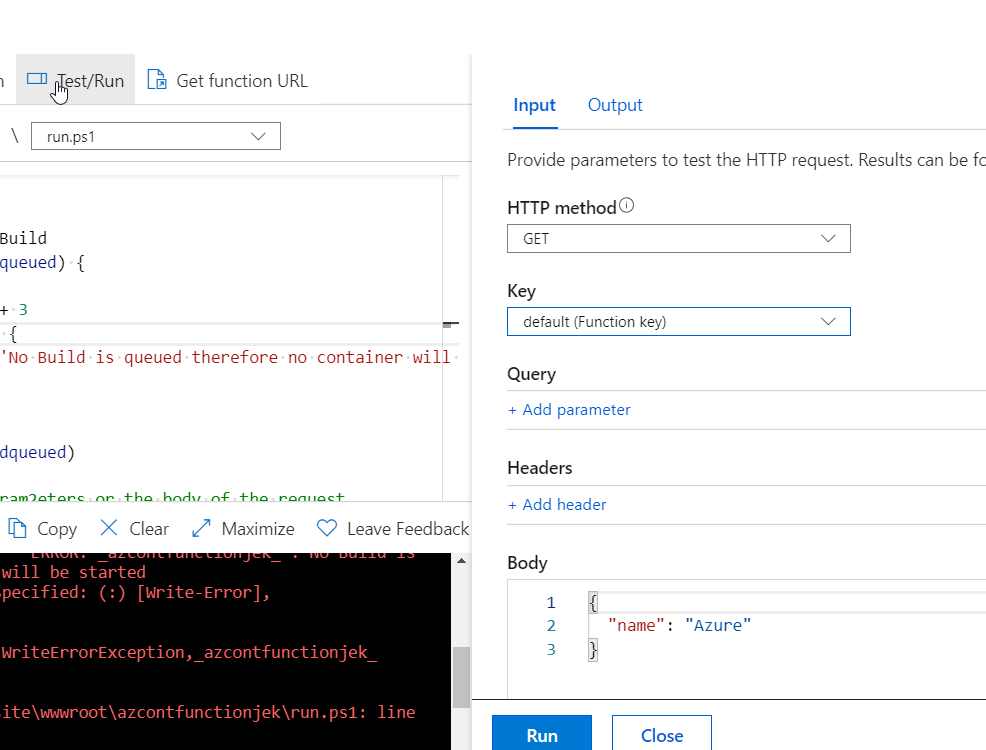
Go to your Function , queue up a test. You should get some sweet info about what’s going on.
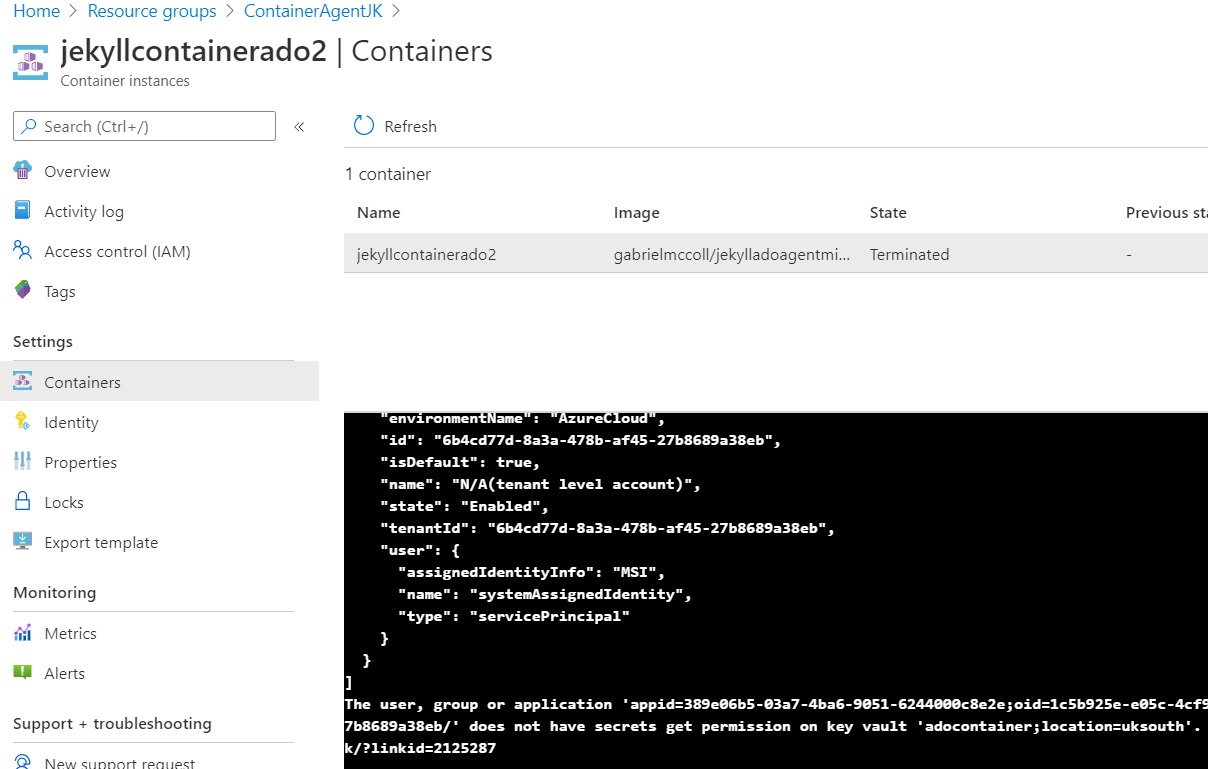
Open another Tab , navigate to your Resource Group Overview. You should hopefully see an Azure Container Instance spin up.
Dig in!
Check out logs etc, see if it’s all working and pulling down etc.
One thing is that sometimes the permissions take a few mins to work their way through. So the very first time you run it, it might not work with a permission error.
If it all looks ok, just try it again in 5 mins or something.
The ACI only costs money when it’s running.
The Function will just start the ACI again and won’t need to create a new one.
It will pull down the dockerfile every time.
So the smaller the better.
Hopefully it all works and you have a successful build
APPENDIX
Simple Hello World Yaml
# Starter pipeline
# Start with a minimal pipeline that you can customize to build and deploy your code.
# Add steps that build, run tests, deploy, and more:
# https://aka.ms/yaml

trigger:
- master

pool:
  vmImage: Jekyll #Or whatever you called your Agent Pool

steps:
- script: echo Hello, world!
  displayName: 'Run a one-line script'

- script: |
    echo Add other tasks to build, test, and deploy your project.
    echo See https://aka.ms/yaml
  displayName: 'Run a multi-line script'
The Dockerfile / Image
Here is the Dockerfile for the docker image I’m using.
Anyone who’s better at Docker than me (most people) or bash (most people) feel free to give me tips. It’s mostly based on the official Microsoft one from here.
This is the start.sh that the dockerfile uses.
Unnecessary buttons