Getting Started With Powershell for Your Ops Team - Source Control
May 4, 2017
8 mins read
Source Control is so EASY
Are you or your team a bit old school? PowerShell‘s kind of just crept up on you out of nowhere and suddently everyone‘s using it and some stuff isn‘t even in the GUI and some stuff doesn‘t even have a GUI and you don‘t know where to start and what if you break everything and what in the hell is a Git. Back in the day a Git was what you called someone whose policies on appropriate behaviour you didn‘t agree with and you certainly didn‘t want it in your team. Now everyone‘s talking about it and wanting to be involved. Is this just a sign of the severe moral decline or is there more to it?
I‘ll help you.
There are a lot of articles out there for getting started with Source Control, Git, Visual Studio , Dev Ops and Powershell. I‘m hoping this one stands out a bit as it‘s going to be a step by step guide for getting going with some good practice and using free industry standard tools that you already have sitting. Please note, I am not an expert. This will not get complicated. I am unable to make this complicated.
I am too ignorant
but, I know enough to be useful. That‘s where you want to be. Knowing enough to be useful and understanding what‘s going on so you can continue climbing up the jaggy mountain of knowledge. It‘s Cloud knowledge so it vanishes under you all the time but if you‘ve went about it smartly, your safety gear will stop you falling too far.
I have totally lost track of this analogy.
Meanwhile back on target
Following along with the article is recommended and here are the requirements and a couple of not even close to requirements for being able to do so. We‘re going to go super basics. Worry about getting just you up and running and then we can worry about collaboration later. I‘m also not even going indepth into how you use Powershell / Scripting or any of that nonsense. This is about how to start your journey with a best foot forward.
- You can install software on your computer.
- An internet connection
- Empathy for the tragedy of Darth Plagueis the Wise (optional)
- A weak lemon drink
Now it‘s important to note there are multiple paths to achieve the same result. I‘m going to give you just one single path though because it will be easiest to follow and I‘m expecting you‘re Microsoft focused at your work so I‘m giving you the purely MS way essentially.
You‘re taking enough on, you don‘t need options. That‘s the Apple way.
So source control basically gives you a safety net, it‘s a constant incremental backup essentially and you build up a series of notes that says what happened. You do it all nice and easy within the program you‘re using to code. I‘m not going to convince you of the merits of it here, search for it. Just trust me, you‘ve read 500 words of mine. I seem like a good guy. These are the words you‘re looking for. You don‘t want to go to another blog. You want to subscribe and rethink your life.
The Steps
First, sign up for Visual Studio Dev Essentials. Which is free and gives you access to many goodies. If you already have a Visual Studio Pro / what used to be an MSDN license then just sign into that instead.
Once you‘ve done that, start a Visual Studio Team Services account. You‘ll keep your Powershell in here. This is your Source Control repository. Find the link yourself or this should work Be careful if you‘re on Azure AD with your work account and it‘s all linked in. There might be one there already. If there is and you have the option to sign in with a personal or work version of your email, then use the personal. This is just for you right now, get started. Sign up and Sign in and click on your name to go to the new account page
So within VSTS , you have Accounts, and then Projects.
Your account is the top level , so start with that.

Make changes to your code, write new stuff, add new files or what not. Then you Commit them to the repo. Then you push them back up.
So ‘ Clone it down. Commit Changes. Push it back up. Along the way you comment as you Commit which keeps track of what the deuce you were playing at and makes it so you can roll back easily if you fuuuu make a mistake.
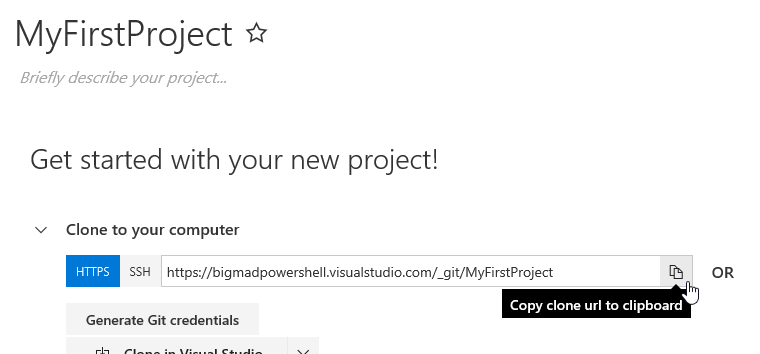
You can‘t have this name, it‘s mine
Swoon! You‘re inspirational. Take a drink of your weak lemon drink. Leave this page up and notice that picture where it says Copy clone url to clipboard. We‘ll come back to that.
Go and download Visual Studio Code , gogogogogo, do it, do it now, you may not have time later! Install it, Start it as Admin. We‘re not going in depth at the moment. This is pure basics stuff. There will be a part 2. This is just getting you into the starter blocks. Woo, sports analogy. See. I can do normal people integration. Now download Git for Windows and install that before you open it.
Open it.
The Tension rises, will they accept you as a Master Jedi?
Yours might look slightly different as I already have stuff installed but go to the options tab, search for and install the Powershell extension.
Go back to the picture below area and get your clone url
Now, you need to get used to command line a bit but the main one you want is CTRL+SHFT+P this opens the control palette which is where you can get every other command from basically. Memorize that. I‘m not repeating it. You need to use it so often the quicker you memorize it the better.
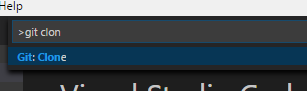
Type Git Clone into the Command Pallet and hit enter
Put that clone URL you got earlier in and hit enter

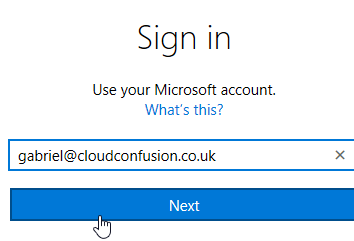
You‘ll be prompted for your credentials to authorise you.
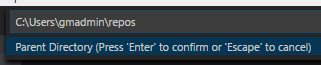
Now put where you want to save it. I default to something like the below and keep all my Repos together. Yeah. Repos. Multiple. I control the dickens out that source. #bigshot
Vscode will then ask you if you want to open the cloned repo.
Of course you do you beautiful unicorn!
Don‘t quit now.

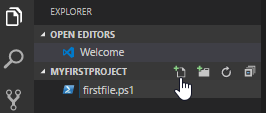
Once it‘s opened, go to the explorer view (pages in the sidebar icon, highlighted in pic. Click the new file icon and then call it anything.ps1. You‘ll see it changes to a PowerShell icon once you call it .ps1. Amazeballs.
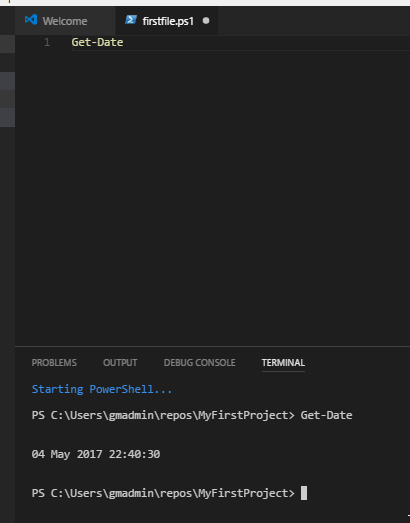
Write a piece of PowerShell code. (You can press f8 to run that line in the terminal below but no need, we‘re just fu.. messing around)
Protect your precious work
CTRL+S to save it
Then open the Command Pallet and type Git Commit to commit your changes. That icon with a 1 next to it is your source control. It tells you how many uncommitted changes you‘ve got.
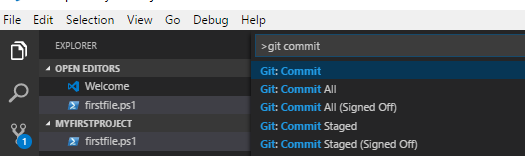
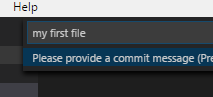
Leave a tasteful and useful comment. You have now Commited your changes
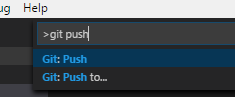
Open the Command Pallet and Git Push it up to your Source Control server at VSTS.
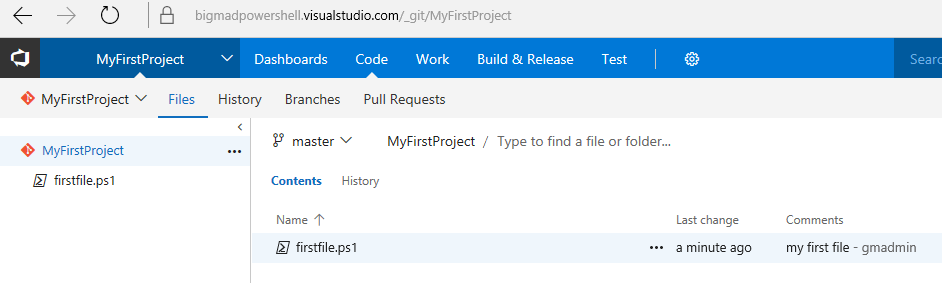
Go look ! , WOOO!
There is tons more to learn but that‘s a great start. Well done. You can basically just repeat that and write more and more code.
Hopefully you‘ve found this useful and entertaining, please share to anyone who might find it useful. They will thank you for it and want to brush your hair.
Unnecessary buttons